Friday, January 20, 2012

Fifth Grade Pagodas


This is an idea I got from the teacher resource Thinking With a Line. I have used the printing ideas previously, but only with PreKinder, Kinder and 1st. I decided to try an activity on architecture with my fifth graders. Since fifth grade is learning about Asia, we focused on pagodas.


We looked at different examples, the lines that were used in them and I had them plan out their building in their sketchbook.

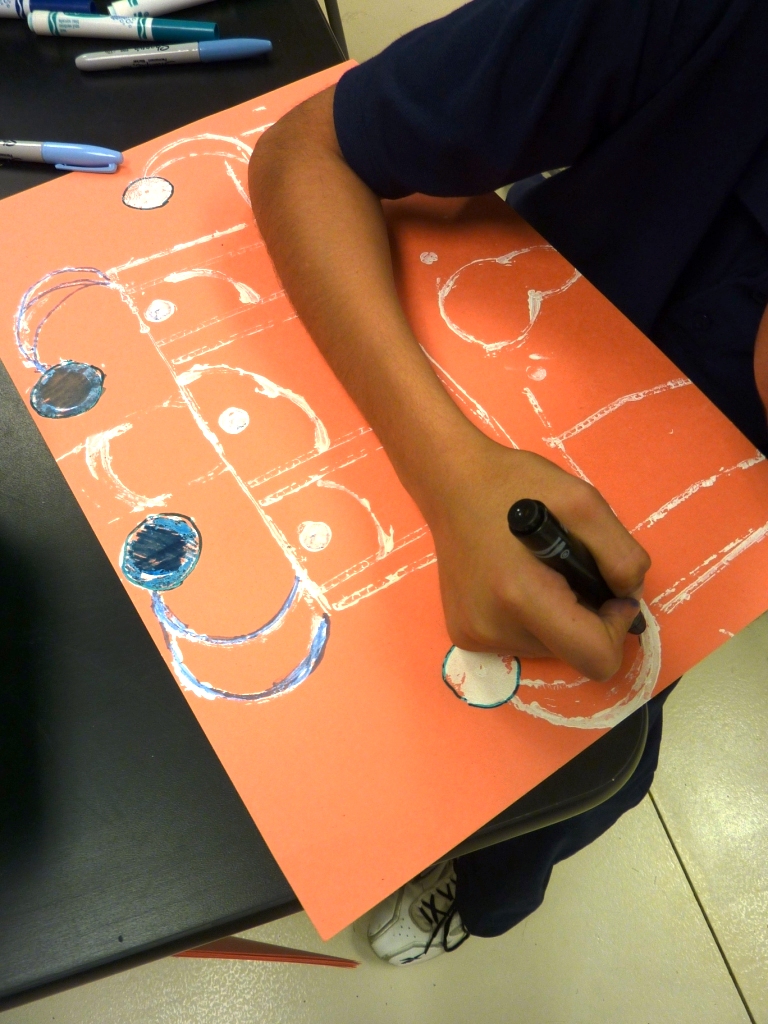
Then I gave each table a basket of printing tools: corrugated cardboard, 1/2 circles (tape rolls that I cut in 1/2), blocks, marker caps, bottle caps, pretty much anything that I thought might make an interesting print.


Each student picked a piece of construction paper and began building their pagoda using white acrylic paint- this was a change for them, since they are used to using black as their outline for everything.

The next week, we discussed color schemes. We reviewed old ones (warm, cool, primary, secondary, complementary, monochromatic) and I threw in a new one (analogous). They had to choose 1 color scheme for their entire pagoda. I gave them a basket with a variety of materials: tempera cakes, watercolors, Sharpies, watercolor markers, color stix, oil pastels. They could use as many as they wanted, as long as they stuck with their scheme.

I was very impressed with the results!


Pin It

Kindergarten Dreamcatchers

Kindergarten is studying North American art. One of the projects that they did before the holidays was to create a Native American dreamcatcher. We had a discussion about dreams- good and bad. Then they talked about what a dreamcatcher could do- catch their dreams (very literal for my second language learners).

I gave each student a paper plate and had them fold it like a taco. They cut the center out using the line that was already on the plate as their guide.

I had pre-wound small spheres of yarn and each child was allowed to choose the color that they wanted. I showed them how to wind the yarn around the plate, making sure to go all the way around to fill up the plate.

They chose a different color yarn and used this to create the web in the middle of the dreamcatcher (winding around the outside of the plate this time).

The next step was probably the most difficult. I put a container of beads on each table and showed them how to take a piece of string and thread it through their yarn so that it was hanging down. They took 5 beads and threaded them onto the string. Originally, I thought that I would have them tie them on- bad idea! I quickly revised my plan and just had them bead and then raise their hand so that I could come around and tie knots for them.

At the end, I let them choose 5 feathers (I had to limit them on the beads and feathers, or else I would have run out of both by the end of the first class!) and they placed them around their dreamcatcher to finish it off!


.
Pin It

Third Grade Pacific Island Tapa Paintings

My third graders are continuing with their study of Australia and the Pacific Islands. They watched a video about how tapa cloth is traditionally made and we looked at some examples of different cloths.


They had a variety of resources to use for planning their project, but I told them that they had to have a patterned border and that the center of their tapa needed to be a theme that represented Australia. I also created a PowerPoint with information and visuals for them:

After planning their projects in their sketchbooks, I gave them a piece of banana paper that I had purchased from Mulberry Paper and More. This made the project extra special for them, since they are used to using basic drawing paper and/or construction paper.

They drew their design onto the banana paper using pencil only. We discussed how they couldn't use eraser due to how fragile the paper was- they didn't want it to rip. Once the design was complete, they traced it with permanent black marker.

For color, we used water soluble oil pastels. 


If you have never used these, they are amazing! The students had 1 main rule to follow: the oil pastel is NEVER allowed to touch the banana paper! They used the oil pastel to color onto a piece of scratch paper. Using a wet brush, they treated this as their watercolor palette. In this way, they were able to get softer colors. I matted the finished products onto black construction paper and they look terrific!


Pin It

New semester craziness

It's been awhile since I have posted any of my student's work... this semester began with a bang! We started off with our district Rodeo art show the week after the holidays- setting up, parent night, and tearing down all in the span of 4 days! Crazy! Now it's time to start getting artwork ready for our Spring Show at a local area shopping mall, our state TEAM (Texas Elementary Art Meet), our district Run for the Arts Auction and... am I insane?!... I decided to attempt a school-wide art museum in April, with a piece of artwork on display for every child (I have 800 students)! And on top of that I am videotaping students talking about their artwork, posting the videos to YouTube and creating QR Codes which are then put onto the artwork so that the parents can scan them with their smart phones and see their child's video. Yikes! Crazy, yes! But do I love it? Definitely!!!! Pin It