Then I read them the old classic, Dr. Seuss's ABC.They loved the silly rhymes and had fun yelling out words that started with each letter of the alphabet.
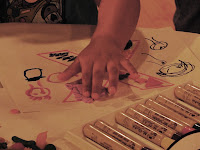
 The 3-5 year olds created blinged out letters. I had large letters on hand that the students traced onto a piece of paper. Then we gave them: markers, crayons, foam shapes, colored pasta (food coloring and rubbing alcohol), GLITTER, scissors, glue, tissue paper, etc. This was very open-ended and many of them enjoyed it so much that they created 3 or 4 letters each.
 The 6-8 year olds used die cut letters (I found mine at Dollar Tree in their teacher section) to trace onto a piece of paper. They overlapped their letters and then used markers, crayons, glitter, pipe cleaners, tissue paper, etc to decorate them. This was quite time consuming, and it was so quiet when I walked into the room where they were working. They were all so focused on coloring in their letters!

 The oldest group of students created a 3D letter (3D Letters). We started out by tracing a letter onto a piece of posterboard 2 times. They cut the letters out and then glued 10 dixie cups (the little ones that you buy for your bathroom) onto on of the letters. After applying glue to the tops of the dixie cups, they placed the second letter on top.
 From there, I had a variety of materials on hand for them to decorate their letters: wrapping paper, scrapbook paper, sequins, beads, glitter, markers, crayons. They got quite creative! This was quite time consuming and many ended up having to take them home to finish them.
Pin It


