Showing posts with label markers. Show all posts

Wednesday, July 9, 2014

First Grade Rousseau Jungles


 First grade looked at a variety of prints by Henri Rousseau. They focused on how the animals seemed to be hidden in the foliage of the jungle.

Then we read the book, Who's the Beast by Keith Baker.

I put out a variety of old calendar pages with animals on them and asked them to practice drawing just the head of the animal. We talked about making the drawing bigger than our hand, so that it would fill up the space.

Once they had the head drawn, I showed them how to draw different plants to make it look like their animal was hiding in the jungle. The plants had to touch the edge of the paper, as well as touch the head of the animal. I also showed them how to draw plants all around the page (top, bottom, and both sides).

 When they had their drawing the way they wanted it, I showed them the 3 choices that they would have for their project:
1.  black glue with liquid watercolor
2.  muslin, glue and liquid watercolor
3.  marker

Black glue with liquid watercolor
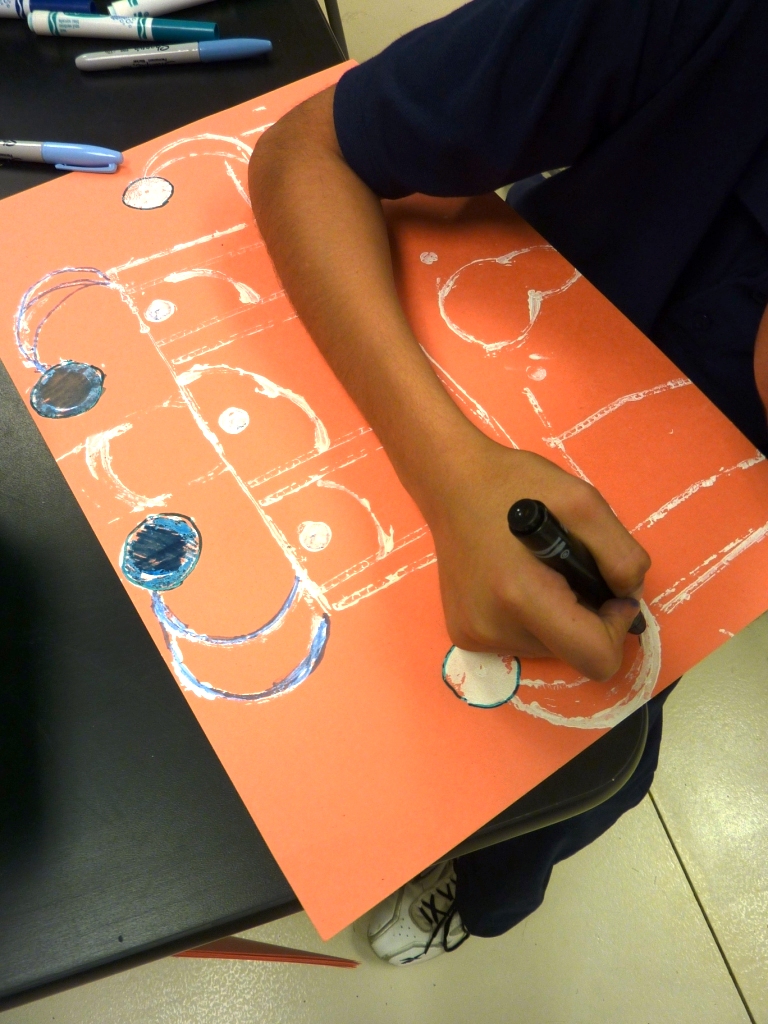
I gave the students a piece of watercolor paper (9x12). They drew their jungle scene with pencil first.

Then they traced all of the lines with black glue (school glue mixed with black acrylic paint).

Once the glue was dry, I put out trays of liquid watercolor. We started with the plants first, so I gave them a 3-4 different shades of green to use. The black glue helped stop the paint from bleeding.

We then moved on to our animals. I told them that since they were the artist, they did not have to paint their animal using realistic colors. If they wanted a pink giraffe, they could make a pink giraffe.


The last step was painting the background (all of the space that was left over). My one qualification for this was that I didn't want them to use a color that had been previously used.


 Muslin, glue and liquid watercolor
For this project, I had pre-cut the muslin into 9x12 pieces.

The students used a pencil to draw their picture onto the muslin first.

Then they traced over the lines with white school glue.

When the glue was dry, they used the same watercolor procedure as the black glue project.

Once the entire project was dry, the glue was peeled off of the muslin.

***This is where we had technical difficulties. The glue was very difficult to peel. I ended up having to peel the majority of it. I tried washing the muslin under water to loosen the glue, but that DID NOT WORK! The glue got very sticky and all of the color washed out of the muslin. Ugh!!

Any suggestions on how to fix this?????????
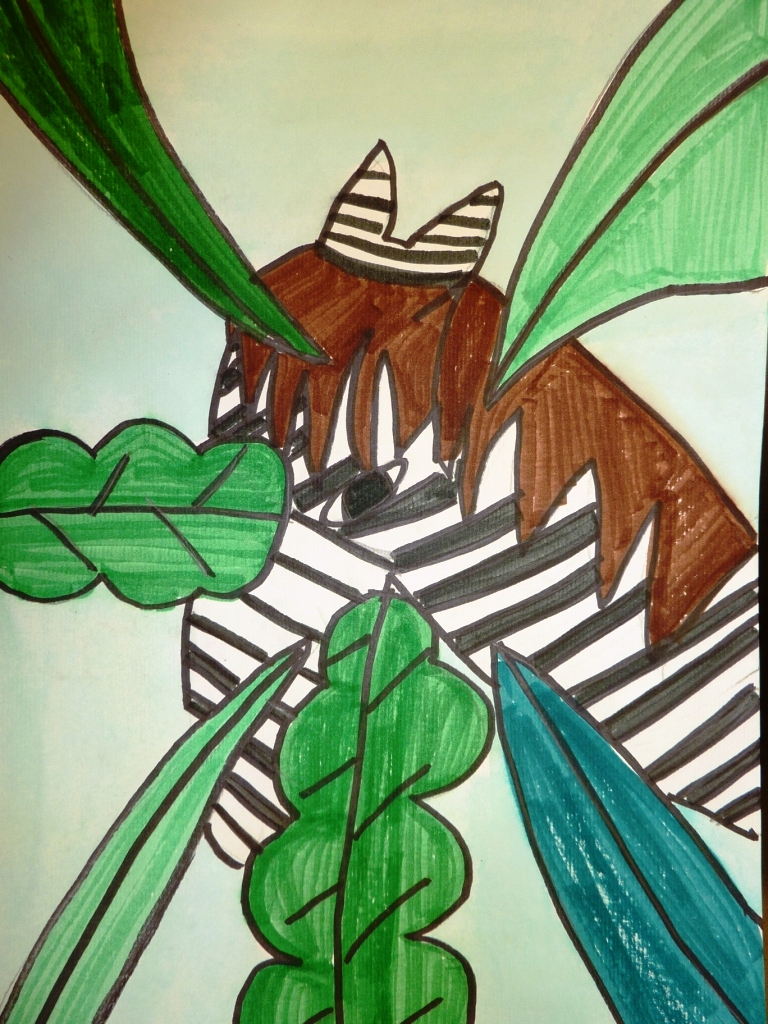


Marker
I gave the students a 9x12 piece of drawing paper. Again, they drew their image with pencil first.

They traced over the pencil with black marker and used an eraser to erase the stray pencil lines.

In my room, I have all of my markers sorted into stackable plastic tubs by color, so for this part, I pulled out the green marker tub. They used any other the green markers that they wanted to color their plants.


 The animals were colored with any colors that the children wanted.

The sky was filled in with a color that they had not previously used.

Overall, I was very pleased with how these turned out. The students did a really good job overlapping their plants and animal and we are finally getting the concept of drawing big!


Pin It

Tuesday, November 5, 2013

Kindergarten Monsters

This was the second project with my kindergartners where I had choices set up in stations for their project.

I began by reading them one of my new favorite books, I Need My Monster by Amanda Noll. Once we were done with the book, the students were shown all of the projects. I had each project set up at a station with 8 spaces available. Once the spaces were filled, the station was closed to anyone else.

Station 1:
Sponge painting monster-
Students had a tray of paint with sponges. They used the sponges to create a general monster shape on a piece of construction paper.
For the second class, they used a basket of sequins, foam shapes and beads to decorate and add eyes, horns, fingers, etc.
The last day was used to add a variety of lines to their monsters: zig zag, wavy, straight, etc using construction paper crayons.

Station 2:
Marker monsters-
Students drew a monster with pencil and then traced it with black marker. They used the black marker to add lines (wavy, zig zag, etc).
The next class was used to color their monsters with markers.
The last day they decorated their monsters with sequins, foam shapes and beads.

Station 3:
Coffee tin monsters-
Students made a monster out of an International Coffee tin (one of our teachers donated 3 large boxes full of these wonderful tins- with their lids!). I used scissors to cut a mouth shape for the students and then they painted the tin with tempera paint.
The 2nd day was used for decorating with sequins, foam shapes and beads.
The last day, they used construction paper crayons to add lines.
Pin It

Tuesday, July 16, 2013

Kindergarten Romero Britto

 A new project that I did with my kindergarteners this year was based on the art of the artist Romero Britto.

I started by putting together a basic Power Point about Britto. The children loved his artwork. They loved the big bold lines and the bright colors.

 Once we had looked at a variety of images, the we brainstormed ideas for some images that we could draw on our paper. I told them that whatever they drew, it had to be large and that I wanted it to be simplified.

There were lots of hearts, flowers and cars....

 I gave each child a piece of paper (9 x 12) and they drew their image in pencil first. I had them trace the image with black marker and then I taught them how to use a ruler- they LOVED this! They felt like the big kids using this tool! They used the ruler to draw lines through their image to divide the image and then used the marker to trace these lines.

They chose their color scheme (warm or cool) and used markers to color each section of the image. We talked about not letting the same colors touch and then they set to work.

When they had finished coloring the central image, we started on the background. We used the ruler again (reminding them of the proper way to
 use it) and they drew at least 5 lines around the outside of their image (most children drew more).

They used the markers to color the background with the opposite color scheme.
 The finishing touch was using metallic markers to decorate different sections with a variety of lines (straight, zig zag, wavy, etc). Some students decorated only a few spaces and some students went to town and decorated every space they could find!

Overall, I was quite pleased with the end result!


Pin It

Thursday, October 18, 2012

Fifth Grade Mandalas

I have done this mandala lesson for a couple of years, but have adapted it this year to allow the students some choice in their final product.

Here are some examples from previous years:

Fifth Grade Mandalas

I start out by showing the students this PowerPoint I found:


The students then had to plan their project in their sketchbooks. I had them decide on which project they wanted to do:

folded paper (to create 8 sections)
folded paper with a CD in the middle
print
hexagon

They had to decide if they were going to use geometric or organic shapes for their design and then which color scheme they wanted to use: primary, secondary, complementary or monochromatic.

While they were working on their plans, I began meeting with each group and helped them get started with the initial steps in their projects- folding paper, using compasses, dividing up their Styrofoam for their prints, etc.

As the project progressed, I met with the different groups to discuss their next step. How they needed to add color- using markers, Color Sticks, crayons, ink, etc.; how to build their hexagon, etc.

The students seemed to really enjoy that their projects had the chance of being completely different than everyone else in the class. I am really hoping that as we go along, they will start to think outside of the box and present ideas to me as to what they would like to do.


Pin It

Monday, February 20, 2012

Fourth Grade Ndebele Dolls

I found this project on Artsonia. It is a project that Linda Welling at Cedar Creek Elementary posted. Funny thing is, I found this PowerPoint to show to my students and it is also from Linda Welling! I added in the YouTube video on the last slide.
I also found this great book, Ndebele: The Art of An African Tribe by Margaret Courtney-Clark. The book has some great pictures of the Ndebele people, their art and the dolls.

Fourth grade continued their tour of Africa by working on an Ndbele doll. They learned about the bead work and artistry of the Ndebele people. I showed them a doll that I had purchased and then they began their own designs in their sketchbooks.

They had a lot of fun with this one. It's been awhile since we have done a simple drawing project. We have been doing a lot of printmaking, collage and sculpture projects, so this was a return to basics for us.

The children decided what they wanted their doll to look like. My only requirement was that, like the Ndebele, they needed to have
at least 3 patterns somewhere on the doll.

Once the design was ready, they drew it on a large piece of drawing paper and traced it with black marker.

Now the fun part!!! They got to use Crayola Color Switcher markers. The majority of my students do not have art materials at home. The only time they get the chance to create is when they are in my room, so when they used the Color Switchers.... you would have thought I hung the moon!

Even better, they liked them so much, that they took better care of them than any other materials we have used thus far!!


Pin It

Friday, January 20, 2012

Fifth Grade Pagodas


This is an idea I got from the teacher resource Thinking With a Line. I have used the printing ideas previously, but only with PreKinder, Kinder and 1st. I decided to try an activity on architecture with my fifth graders. Since fifth grade is learning about Asia, we focused on pagodas.


We looked at different examples, the lines that were used in them and I had them plan out their building in their sketchbook.

Then I gave each table a basket of printing tools: corrugated cardboard, 1/2 circles (tape rolls that I cut in 1/2), blocks, marker caps, bottle caps, pretty much anything that I thought might make an interesting print.


Each student picked a piece of construction paper and began building their pagoda using white acrylic paint- this was a change for them, since they are used to using black as their outline for everything.

The next week, we discussed color schemes. We reviewed old ones (warm, cool, primary, secondary, complementary, monochromatic) and I threw in a new one (analogous). They had to choose 1 color scheme for their entire pagoda. I gave them a basket with a variety of materials: tempera cakes, watercolors, Sharpies, watercolor markers, color stix, oil pastels. They could use as many as they wanted, as long as they stuck with their scheme.

I was very impressed with the results!


Pin It

Friday, June 24, 2011

Second Grade Rousseau's Jungle

 This project was a pretty simple one, but the end effects were very nice.

I started the project by reading the book, Who Is the Beast? by Keith Baker. The illustrations in the book were great for showing the students overlapping- which was what I wanted to focus on in this project.

Before I started reading, I gave the students 3 things to look for in the book:
1)   animals
2)   colors used in the plants
3)   shapes used in the plants and animals

After I finished reading, we brainstormed a list of animals that could be found in the jungle. The students then chose 2 animals and practiced drawing them in their sketchbooks (I have a milk
 crate filled with old calendar pictures that I have collected. I pulled all of the jungle animals and the students used these as their reference materials).

When they had finished their sketches, they chose the 1 animal that they liked the most and drew this on a piece of watercolor paper. The rules for this were:
1) touch at least 2 sides of the paper (to make sure that it was large enough)

2) use a whisper pencil (draw lightly, so that you can erase)


 After they drew their animal, I then showed them how to draw the vegetation. We talked about how Rousseau hid his animals in the plants, so we would have to draw our plants from the side of the paper towards the center, so that they would cover part of our animal. Anything that was covering our animal, we would then erase (thus the reason for using a whisper pencil).

Rules for this step:
1)   plants had to touch the animal

2)   had to have plants coming from the top, bottom and both sides of the page

I also told them that they didn't have to draw just leaves. I showed them pictures of different flowers that they could use, also.
 When they had finished their drawing, they used black marker to trace the entire picture and then colored in their animal and plants. I had bought every kind of Crayola marker imaginable (Bold, Tropical, Standard) so that they would have a variety of colors to choose from. They were asked to try and use each green only 1 time, so that they would have variety in their jungle.
 For the background, we used liquid watercolor to create a wash. I gave each child a cup with watered down blue watercolors and they painted in any areas that had not been colored with markers.

I love the contrast between the markers and the watercolor!
This last piece (the zebra) was voted as Artist of the Week on Artsonia (http://www.artsonia.com/). She won a $50 gift certificate to Dick Blick and a plaque with her name and a picture of her artwork on it!

She was thrilled. I sat with her and helped her order her art supplies- it was like Christmas morning when the box arrived! Markers, sketchbooks, oil pastels, glitter! Every child's dream! Pin It