Saturday, July 3, 2010

Kindergarten Monet Water Lilies

Materials:
• Watercolor paper
• Oil pastels- take out black and brown
• Watercolor paints
• Lg watercolor brushes
• Water containers
• Green construction paper
• Coffee filters
• Watercolor markers
“Water Lilies”-Claude Monet

“Waterlilies and Japanese Bridge”- Monet


I started this project by reviewing warm and cool colors and lines (straight, zig zag, dotted, etc). Then I had the students choose whether they wanted to use warm or cool colors to draw the lines on their watercolor paper.

Each table had a basket of oil pastels on it (I purposely took out the the black, brown, pink, etc). They had to use their color scheme to fill their paper with lines.

Then I showed the students how we were going to make our lilies. I used watercolor markers on coffee filters and again, drew lines on them. Each student had 3 coffee filters that they drew lines on. When they were finished, they brought their filters to me and I dipped them into a bucket of water and they got to squeeze the water out of them and put them onto paper towels to dry.

For the 2nd class, we did a wet-on-wet watercolor wash on their background. I showed them how to use a spray bottle to spray their paper from side to side, top to bottom (I counted 6 sprays and put the bottle down). Then we dipped our brushes into water and got our cool color watercolors wet. We washed the paper with cool colors, making to sure to give our brush a bath when we wanted to change colors.

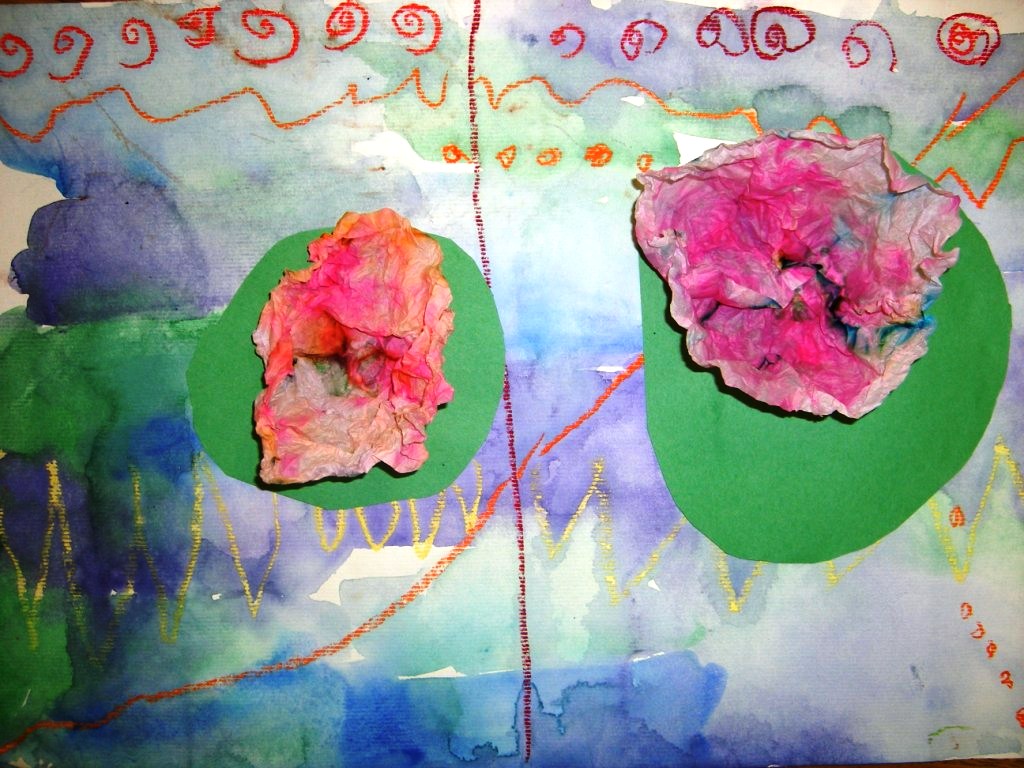
For the last class, I gave each student 1 piece of green construction paper and showed them how to cut 3 big ovals out of it. I passed out their coffee filters, which they opened up. There were lots of ooh and aahs when they saw how the colors had bled. They used glue dots to trace around the green ovals and placed these onto their background papers. Then they placed 3 glue dots in the middle of the lily pad and placed their flower on it. I had them hold it down and count to 20 to make sure it stuck to the paper.

When they were finished, we compared our art to the art of Monet. They were very excited that they looked so similar! Pin It

Friday, July 2, 2010

Prekindergarten Jackson Pollock Paintings

This was probably my favorite project that my PreK students did this year! We looked at paintings by Jackson Pollock. This was something new for them. They were used to being able to "see" something in the artwork. I heard words like "ugly", "weird", "messy". There were some very strong reactions to what they saw- exactly what I was looking for!

I put large pieces of white paper (18 x 24) on the floor. My room was covered in paper! I spread them out so that the students had enough room.

I showed the students how they were to dip their brush into the paint (for this I used fluorescent tempera) and then let the paint drip onto the paper. I stressed that I did NOT want the brush to touch the paper. This was hard for them. So I showed them how I wanted them to stand up tall over their paper and hold their brush. If they were standing up, they could not touch their paper.

I let them get started with 1 color of paint and then I started rotating around the room, switching the colors until everyone had used every color. My PreK classes come with an assistant, so I had help with this part. It was still a little crazy. I need to figure out a more organized way to switch the paint. Suggestions from anyone??

Warning! By the end of class, my floor was covered with paint. However, my little ones LOVE cleaning, so I passed out wet towels and set them loose cleaning up the floor once all of the papers were picked up. The mess was cleaned up in less than 5 minutes! Pin It

Prekindergarten Pinch Pots

For a first-time clay experience, I have my Pre-K kiddos make pinch pots. It's a great way for them to get their hands on the clay without having to worry too much about them overworking it.

I start out by giving them a piece of clay about the size of their hand (they have small hands, so the piece is not too big). I show them how to use their muscles (we get lots of giggles at this point) to squeeze the clay and make it into a ball. This is a good time to stress that it does not have to be perfect!! I usually tell them that I will count to 5 (slowly) and when I get to 5, they have to put their clay down and their hands in their laps.

Once they have made a ball of clay, I have them show me their thumbs. We stick our thumb into the middle of our ball of clay, without going all the way through- we don't want a donut!

Then I have them show me their crab claws (again, lots of giggles). We put our thumbs into the hole that we made and our fingers on the outside and pinch. I show them how thick we want the walls of our pot to be. I also show them what happens if we make our walls too thin- they bend and fall over.

When they are finished making their pinch pot, they bring them to me so that I can carve their initials and teacher's initial in the bottom.

By the next class, I have fired them (they usually take about 3-4 days to dry in my room), so they are ready to glaze.

I pour glaze into baby food jars and set 3-4 colors on each table. We talk about how our paintbrushes need to take a bath once they get dirty, so that we don't mix our paint colors. With 4 year olds, some get this and some don't. They are so excited to be painting, that I don't worry about it too much at this point. This is why I limit the colors and amount of glaze that they get. Pin It

Thursday, July 1, 2010

Prekindergarten Mondrian Lines

This is an activity that I do every year with my prekinder classes at the very beginning of the year. My main objective in this project is teaching them how to use glue dots- "just a dot, not a lot"- on their artwork. For many of my students, they have never had access to glue and the instinct is to go CRAZY with it. I try to nip it in the bud with this activity.

We look at Mondrian prints, naming the colors and shapes that we see in his artwork.

I give each of them their own white paper. Each table has a basket with strips of paper in it in a variety of lengths. I usually stick to red, yellow, blue and black, but you could change this to fit your needs.

I start with a long strip and show them how to place 6 small dots of glue on it and then place it on my paper. Then I show them how to put 3 dots on a medium strip and 2 dots on a short piece.

A great classroom management activity that ends up in some fantastic artwork! Pin It

Prekindergarten Handpainting

For this activity, my prekinder students began learning about primary and secondary colors.

To begin the project we read the book Mouse Paint by Ellen Stoll Walsh. We talked about the 3 colors of paint that the mice jumped into (primary) and the 3 colors that they made when they danced in the paint (secondary).

Each student had a piece of watercolor paper and traced their hand at least 5 times (more if they could fit it). We talked about not letting the pencil touch their fingers so that they didn't get skinny fingers.

When it was time to paint, I had 1/2 of my tables set up with primary color tempera cakes and the other 1/2 set up with secondary tempera cakes. They chose a table to sit at and used the colors on that table to paint ONLY their hands.

For the next class, I put the tempera cakes out again, but this time I helped them look at the colors that they had already used. If they had already used red, blue and yellow, then they had to sit at a table with orange, green and violet and vice versa. For this part, they were painting the background of their paper. Pin It

Kindergarten Bluebonnets

The rodeo project that I do with my kinder classes is another bluebonnet project. I do this one after we have studied different types of lines and warm/cool colors. We begin the project by looking at VanGogh's Sunflowers. We look at the different parts of his painting: the vase, the flowers, the stems.

We start our project by making the vase. The students choose the colors that they want to use for their vase (either warm or cool). They get a 1/2 piece of paper and fold it in 1/2. The draw a line from 1 side of the fold to the other side of the fold and then cut it out. When they open the paper up, this is their vase. They decorate their vase by creating patterns using lines in their chosen colors. They glue this onto a larger piece of paper (also in their chosen color) using glue dots.

They draw flower stems with either a green crayon or oil pastel.

During the next class, they add the flower petals for their bluebonnets. I put tempera cakes on each table. They get blue and either white, cream or yellow. I showed the students how to use 1 finger only to dip into a tub of water and then rub in the paint. They use this finger to create fingerprints along their flower stem.

When they finish making the blue petals, they add highlights to the flowers by dipping their finger into the lighter color (white, cream or yellow) and making a print on top of the blue print. Pin It

PreKinder Matisse Animals

For this project, we started with the background paper. I gave each table pieces of colored tissue paper. (Make sure that it is NOT the bleedless tissue paper. You want the color to transfer to the background.) Each table had bowls of vinegar and paintbrushes. The students put pieces of tissue paper on their white background paper and brushed the tissue with vinegar. They covered the entire paper with colored pieces of tissue paper. We put these up to dry for the next class.


For the next class, I read the book Brown Bear, Brown Bear to the students.
We talked about the different animals in the book and the shapes that are used
 to draw them. Each student chose 1 animal to make using die-cut construction
paper shapes. I reminded them how to apply glue using dots and they got to work.

When their animal was finished, they used crayons to decorate their animal. Pin It

PreKindergarten Torn Paper Bluebonnets

In Houston, a big part of our fall semester is spent preparing for our annual Houston Livestock and Rodeo Exhibit. I have each grade level work on a project for this big event.

My prekindergarten students made Torn Paper Bluebonnets this year. It was the first year we did this project and they turned out beautiful!

We started the project by doing a wet-on-wet watercolor background. The students used spray bottles to spray a piece of watercolor paper with water. Then we used liquid watercolors and dropped color onto the paper using an eye dropper. For this particular project, we were learning about warm and cool colors, so we used warm colors on the background.

The students loved watching the colors bleed into each other!

We repeated the same process on a smaller piece of paper for the flowers. However, this time, we only used blue (cool colors).

By this point, the first session was over and we left the papers out to dry.

For the 2nd session, the students worked on tearing the blue papers into little pieces. I showed them the size we wanted (about the size of a quarter) and they set to work. By the end of the class, we had a flurry of blue flower petals all of over the room!

For the 3rd session, I had patterns for the vase ready to go. The students traced the pattern onto a piece of wallpaper (adding texture to their picture) and cut it out. They glued these at the bottom of their paper and added 3-5 strips of green constructions paper for the stems.

Then they started gluing flower petals onto the stems to finish off their Texas Bluebonnets.

I only meet with my Prekinder classes for 15-20 minutes, so I needed to break the project up into very short increments. It took us 3 classes to get them finished. Pin It