Showing posts with label printmaking. Show all posts

Wednesday, February 12, 2014

Second Grade Aztec Suns

Continuing with our Latin American projects, second grade did suns inspired by the artwork of the Aztecs.

Everyone began the project by drawing their idea for a sun in their sketchbook. They had to make sure that their drawing was large (one of my focuses for my 2nd graders this year- they love drawing everything tiny!), that it had a variety of patterns and that it used 1 color scheme (they chose from warm, cool or complementary colors.

Once they had finished their preliminary sketch, they chose which project they wanted to work on.

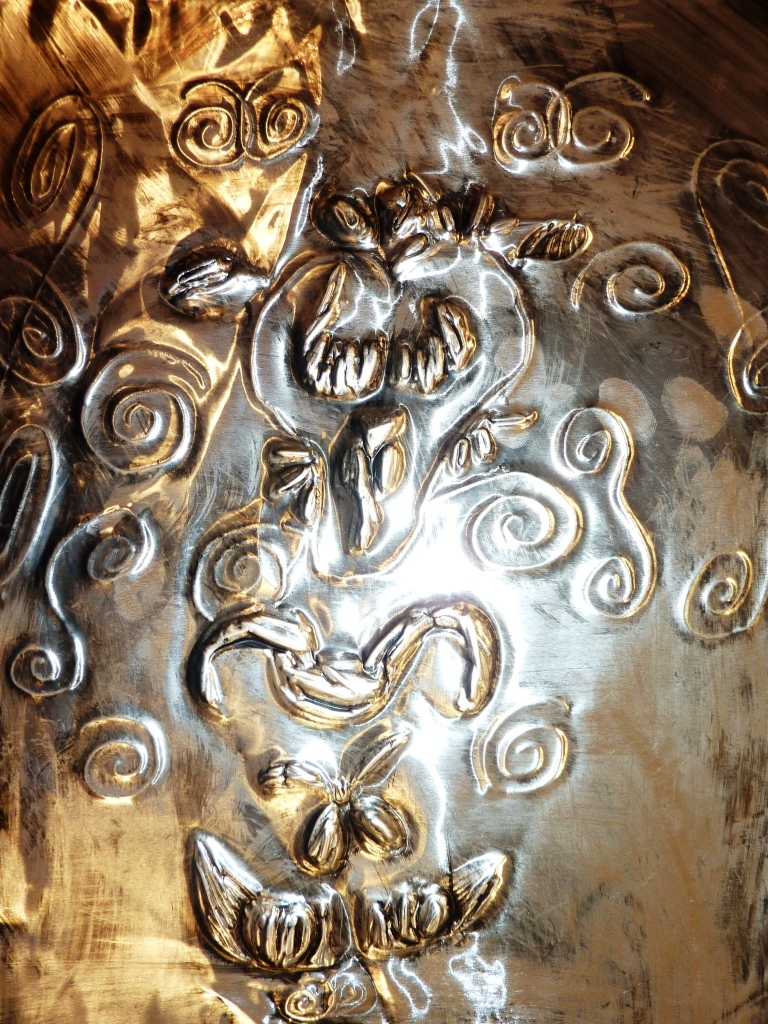
Their first choice was an aluminum bas relief. They drew their sun on a piece of manila that was cut to the size of the aluminum (5 x 5). Then they taped the manila onto the foil and traced the design. They were told to do the tracing while the aluminum was sitting on top of their sketchbook, so that it would leave a nice impression. After tracing, they removed the manila and used their pencil to color in certain sections of their design, creating the bas relief. Color was added with Sharpie markers and then the aluminum was stapled to a piece of black construction paper to create a matt.

The second choice was a printing project. The students drew their design on a piece of 5 x 5 manila paper. They taped this onto a piece of styrofoam that had been cut to the same size. Once the design had been traced, they removed the manila and used their pencil to color in certain sections. They chose pieces of construction paper that fit their color scheme and printed their design onto the paper. The prints were glued onto black construction paper to create a matt.


The third choice was a sculpture project. The students used recycled materials to create a sculpture of the sun that they had drawn in their sketchbooks. I have a variety of boxes outside of the artroom where the faculty can drop off their recycling. I have egg cartons, boxes, newspaper, bottle caps, lids, containers, cardboard rolls, magazines, etc. The students have gotten used to going to these bins anytime they are in need of materials. 

The students collected the materials that they wanted for their sun and stored them in a zip-lock bag. They were glued onto a piece of cardboard (saved from packs of construction paper that the teachers get with the students school supplies at the beginning of the school year) with craft glue (Elmer's is not strong enough for this project). When everything had been glued in place and was dry, they used markers and tempera to color it in their color scheme. The last step was to add details by gluing sequins onto the sculpture.


Pin It

Wednesday, February 5, 2014

Second Grade Day of the Dead

We started out by looking at a presentation on the Day of the Dead and discussing where and when the Day of the Dead is celebrated. We focused this project on the Day of the Dead calaveras (skulls). They children practiced drawing their skull in their sketchbooks and colored them using complementary colors.

There were 3 choices for projects:

The first one was a calavera made out of Claycrete. The students mixed the claycrete with water and glue and formed the shape of the skull. Once it was dry, they painted it 1 color with acrylic paint. They added facial features with sequins, pipe cleaners and other materials that they found interesting.


The second project was a calavera in a frame. They drew the skull onto a transparency and painted it with white acrylic paint. They turned the transparency to the back side and used Sharpies to decorate it.


The third project that the students could choose was a printing project. The student drew their calavera onto a piece of cardboard. They traced it with white glue and let it dry. Then they made three different prints using the cardboard. The first print was a crayon rubbing. The second print was done by rolling ink onto the cardboard and creating a print on white paper. For the last one, they covered the cardboard with a piece of aluminum foil and then rubbed the foil so that the glue created a bas relief. They used Sharpies to color the aluminum.

Pin It

Tuesday, July 16, 2013

First Grade Starry Night Cityscapes

 This became my favorite project that the first graders did this year! This was a 2 part project. We started by reading the book City Lullaby by Marilyn Singer. As we read, we talked about the different sights and sounds in the city.

Then we made our cityscape by printing with white acrylic paint and recycled tools (corrugated cardboard, tape rolls, toilet paper rolls, blocks, etc).

The students needed to start their city at one side of their paper and continue over to the other. We talked about how the buildings could be different heights and how they should have windows, doors, etc.

The next week, they created the background with a black piece of construction paper and oil pastels. Each table had a selection
oil pastels that had been rubber-banded together (2 or 3 colors together), and they made their swirls starting from one side of their paper all they way to the other side.

They cut out their cityscape and glued it onto their background.

To give it a little bit of sparkle, I let them glue sequins onto the sky for their stars.


Pin It

Thursday, June 13, 2013

Tall Tales and Art- Only One You

 Today's book was Only One You by Linda Kranz. I have always wanted to work with this book and I finally got the chance.

I read the book to the children and as we always do, we broke into age groups.

The younger students (ages 3-5) created a watercolor fish. The inspiration for this activity came from: There's A Dragon in my Art Room.

They started by drawing their fish on white paper and tracing it with black marker. Then they used liquid watercolors (many of them had never used these before and they LOVED the vibrant colors that they were able to use for their fish).

They cut out their fish and glued them onto a background. We had some turquoise paper which worked nicely for an underwater scene. Then came the decorating. Glitter, foam shapes, tissue paper, sequins and GLUE were all made available to the children for their fish.


The next age group (6-8 yrs old) created Gyotaku fish prints. The inspiration for this activity came from That Artist Woman.

 They painted the fish (we did not use real fish for this, but I have heard that you can... we bought the rubber fish for this activity) with acrylic paint. The students then created 1 print on a piece of paper. This pulled most of the paint off of the fish. Then they used a piece of muslin to create a second print, pulling the rest of the paint off of the fish.


The last group of students (ages 9 and up), painted river rocks. I bought river rocks at Home Depot. The children were able to choose the rock that "spoke" to them. Some looked for a certain shape, others looked for certain coloring. It was interesting to see how they searched for their particular rocks. They used acrylic paint and created their own individual rocks. Since I had made sure to have plenty of rocks on hand, some children went home with 5-6 painted rocks.


Pin It

Thursday, January 3, 2013

Third Grade Maori "Tattoos"

As part of third grades study of Australia, they learned a little bit about the Maori people of New Zealand. I showed them a PowerPoint that I had put together:


Then I passed out copies of different Maori designs that I had printed out from Google. The students used these as their inspiration. They created 2 different designs in their sketchbook. The students had a lot of fun with this project. They all know someone with a tattoo and this was a harmless way for the students to create their own.

For their project, I gave them 2 choices (trying to keep with the choice-based outcomes):
1. printmaking
2. aluminum bas relief

As the students finished up their sketchbooks, they picked up a piece of white paper (9 x 12) and drew their favorite design onto this paper, making sure to fill their space.

While they were working on this, I used this time to meet with my 2 groups to demonstrate the steps for each project.

For the printmaking:
The students taped their paper onto a piece of styrofoam and traced their design with their pencil. After that, they removed the paper, traced one more time and then used their pencil to color in the positive space.

For the aluminum:
The students taped their paper onto a piece of pre-cut aluminum (I buy it in rolls and cut to whatever size I need). They placed this on top of their sketchbook so that they had a fairly soft surface and traced their design. Then the paper was removed and they used their pencils to color in the positive space.

I then set up stations in the back of the room for each project.

Printmaking:
White ink and brayers- they students rolled the white ink onto their styrofoam and then placed the styrofoam onto a piece of black construction paper. Using a clean brayer, they rolled it onto the back of the black paper, helping to transfer the ink. Once they were finished, they washed their styrofoam.

Aluminum:
Black india ink and brushes- the students painted the aluminum with black ink. Then using paper towel, they wiped as much of it off as they could, leaving ink in the crevasses made by coloring in the positive space.


Pin It

Monday, December 10, 2012

Fifth Grade Pagodas

I adapted last year's pagoda lesson to allow for more choices on the part of the students. They were able to choose between printing, drawing and sculpture.

The printing project was the same project that was completed last year: Pagoda Printing

For the drawing project, the students drew the pagoda they wanted. I had them trace their composition with a black Sharpie and then they colored them using Crayola Color Sticks. For this project, I did a lesson on basic shading. They decided where they wanted the light source to come from and then used the Color Sticks to create light and dark areas in their building.

The sculptures were made out of 100% recycled materials: cardboard, bottle caps, cork.... basically if they found something they wanted to use, they went for it. Then the used tempera cakes to paint them. I think next year, we might try acrylic. The tempera didn't have the vibrancy that I was looking for.


Pin It