Showing posts with label third grade. Show all posts

Thursday, November 6, 2014

Third Grade Didgeridoos

Third grade's Australian study began this year with the making of a didgeridoo.

We read the book, Do You Do A Didgeridoo? by Nick Page. 

Once we had read the book, we learned about Australian didgeridoos.

The students started out by working on 6 different patterns in their sketchbooks. I had a variety of Zentangle pages handy for them and they were also encouraged to come up with their own ideas.

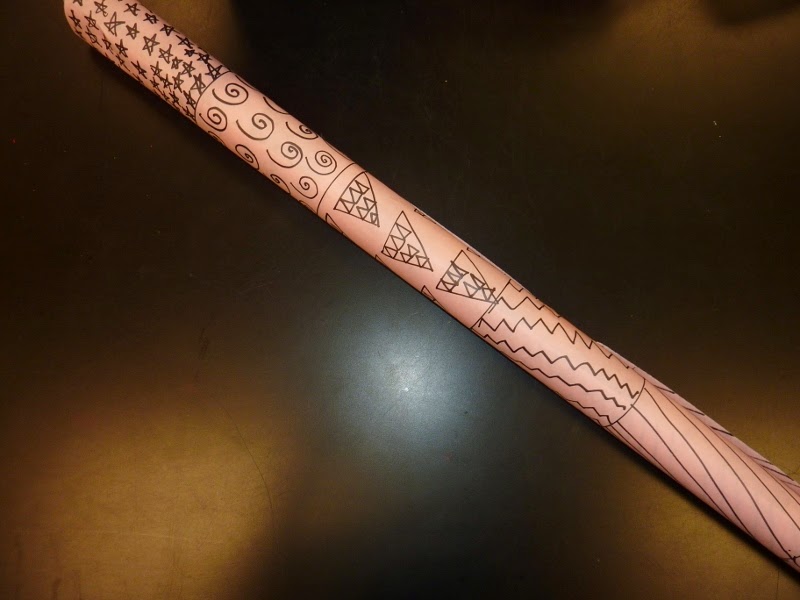
Once their 6 patterns were completed, each student received a piece of butcher paper. They divided the paper into 6 sections and recreated their patterns with a black marker.

When the patterns were done, they taped paper towel and toilet paper rolls together to make the didgeridoo. The butcher paper was wrapped around the rolls and voila!


Pin It

Thursday, January 3, 2013

Third Grade Maori "Tattoos"

As part of third grades study of Australia, they learned a little bit about the Maori people of New Zealand. I showed them a PowerPoint that I had put together:


Then I passed out copies of different Maori designs that I had printed out from Google. The students used these as their inspiration. They created 2 different designs in their sketchbook. The students had a lot of fun with this project. They all know someone with a tattoo and this was a harmless way for the students to create their own.

For their project, I gave them 2 choices (trying to keep with the choice-based outcomes):
1. printmaking
2. aluminum bas relief

As the students finished up their sketchbooks, they picked up a piece of white paper (9 x 12) and drew their favorite design onto this paper, making sure to fill their space.

While they were working on this, I used this time to meet with my 2 groups to demonstrate the steps for each project.

For the printmaking:
The students taped their paper onto a piece of styrofoam and traced their design with their pencil. After that, they removed the paper, traced one more time and then used their pencil to color in the positive space.

For the aluminum:
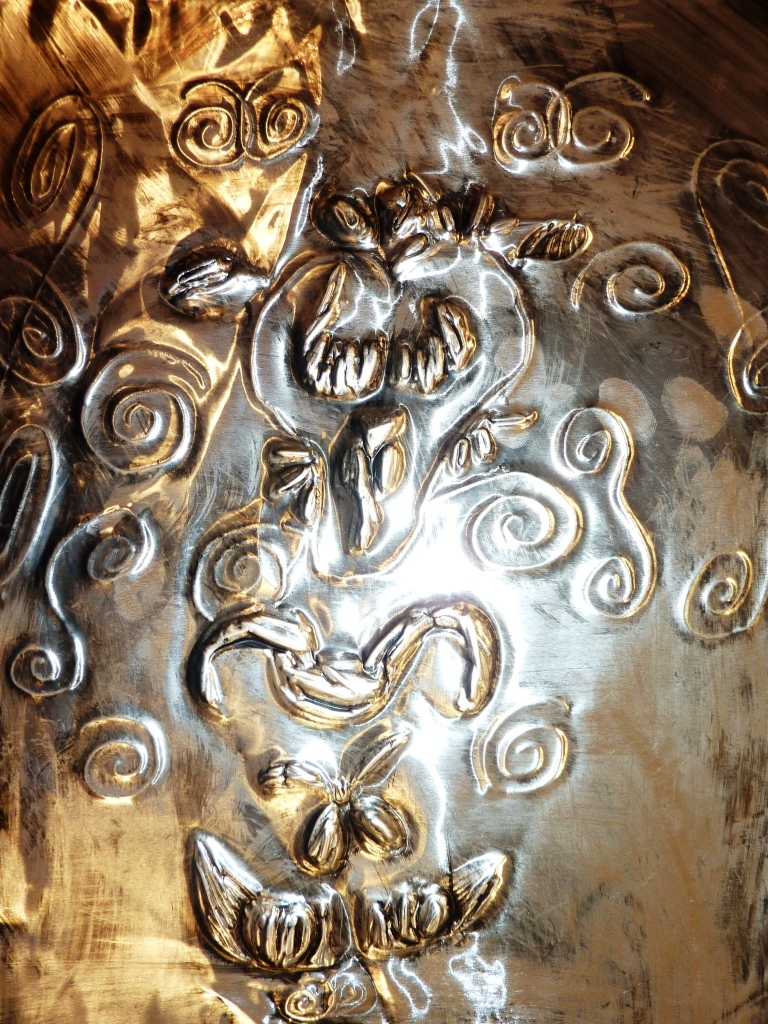
The students taped their paper onto a piece of pre-cut aluminum (I buy it in rolls and cut to whatever size I need). They placed this on top of their sketchbook so that they had a fairly soft surface and traced their design. Then the paper was removed and they used their pencils to color in the positive space.

I then set up stations in the back of the room for each project.

Printmaking:
White ink and brayers- they students rolled the white ink onto their styrofoam and then placed the styrofoam onto a piece of black construction paper. Using a clean brayer, they rolled it onto the back of the black paper, helping to transfer the ink. Once they were finished, they washed their styrofoam.

Aluminum:
Black india ink and brushes- the students painted the aluminum with black ink. Then using paper towel, they wiped as much of it off as they could, leaving ink in the crevasses made by coloring in the positive space.


Pin It

Saturday, November 24, 2012

Third Grade Great Barrier Reef

Last year's lesson: Great Barrier Reef Creatures


Pin It

Monday, June 25, 2012

Third Grade Great Barrier Reef

In year's past, 3rd grade's clay project has been fish- Third Grade Clay Fish

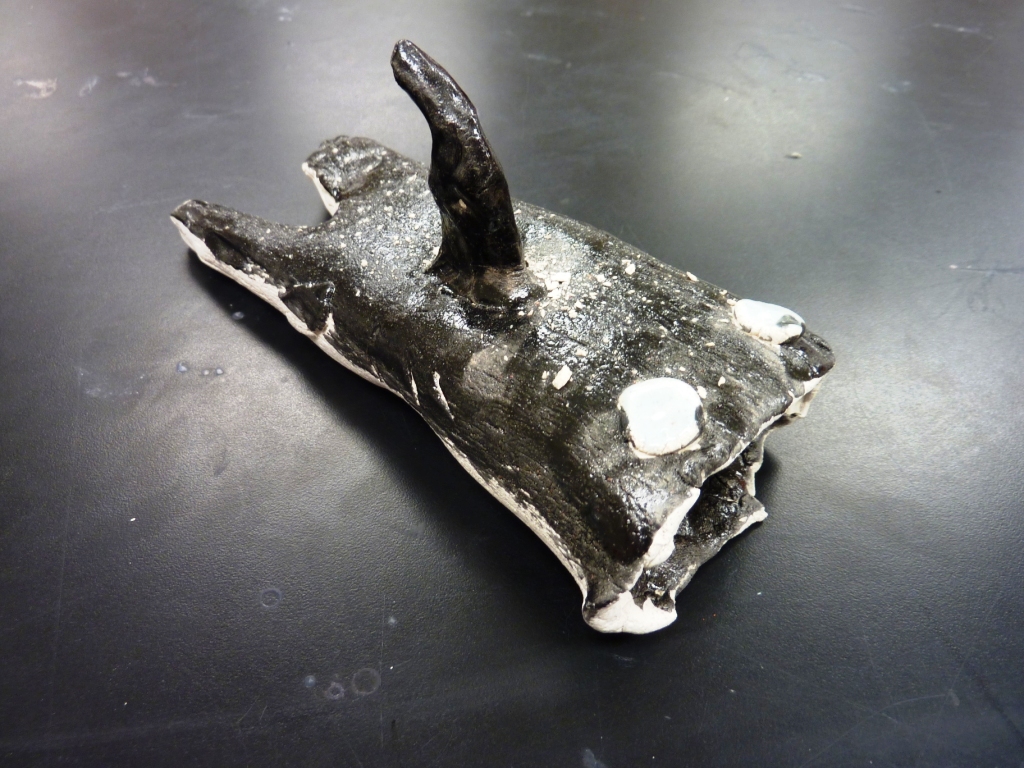
This year, in keeping with 3rd grade's study of Australia, their clay project was about the Great Barrier Reef.

I found this great PowerPoint online (unfortunately, I don't know who created it, so I can't give the appropriate credit. Sorry!)


After looking at the PowerPoint, we brainstormed as many different animals as we could think of who live in the Great Barrier Reef. Each student had to create 2 drawings in their sketchbooks of different animals. They were allowed to use the resources that I had available for them or use the Netbooks to look up animals.

Once we had our drawings ready, I did a demonstration of how they could use the clay to build their animals.

Here are some of the animals that were created:


Pin It

Wednesday, June 20, 2012

Third Grade Didgeridoos

The last project that the 3rd graders worked on this year was an Australian didgeridoo.

I started out by reading the book Do You Do a Didgeridoo? to them. It's a very silly, sing song book and they loved it! After that, I showed them a Power Point that I had put together explaining what didgeridoos are, how they are made and at the end, included a YouTube video of an aborigine man playing a real didgeridoo.


After this, we went to the teacher work room and each student got a piece of butcher paper (I let them choose their color). We went back to the room and I had them divide their paper into at least 8 sections. I demonstrated how to fill each section with a Zentangle design using their fine tip black marker (we used quite a few of these- 3rd and 5th grade were both using them and with 200 students using markers, they either dried up or the tips got smashed).


When their designs were completed, I showed them how to take either paper towel rolls or toilet paper rolls (I always haveb large bins outside of my door where students and faculty can drop off any items that they want to recycle, so I had plenty for this project!) and tape them together so that they were long enough for the butcher paper to wrap around.

We used clear packing tape to tape the outside and I have stored these for the summer so that I can put them on display when we go back to school in August.

Unfortunately the pictures are not the best, but hopefully you will get the idea. I think next year, I will give them more than just black markers.....


Pin It

Third Grade Aborigine Dot "Painting"

Continuing with 3rd grades trip to Australia, we, of course, had to do a project based on the aborigine people.

We looked at a couple of Power Points that I found on the aborigines and discussed the similarities and differences between aborigines and Native Americans.

I have included one of the Power Points that we looked at, however, I  am not sure who/where it came from. I apologize for not giving credit to the author!
I added in a YouTube video at the end of an aboriginal artist creating a dot painting.


Note- I had looked everywhere trying to find a class set of Presto Dots and was unable to find them anywhere, only the single packages (which was way out of my budget!). Luckily, when I went to our state art conference (TAEA), I stopped by the Crayola booth in the exhibit hall and explained what I wanted to do to one of the Crayola representatives. She was so wonderfully helpful and understanding- she sent me a box of 60 Presto Dots! A HUMONGOUS thank you goes out to Crayola for their help on this project!!


Pin It

Friday, January 20, 2012

Third Grade Pacific Island Tapa Paintings

My third graders are continuing with their study of Australia and the Pacific Islands. They watched a video about how tapa cloth is traditionally made and we looked at some examples of different cloths.


They had a variety of resources to use for planning their project, but I told them that they had to have a patterned border and that the center of their tapa needed to be a theme that represented Australia. I also created a PowerPoint with information and visuals for them:

After planning their projects in their sketchbooks, I gave them a piece of banana paper that I had purchased from Mulberry Paper and More. This made the project extra special for them, since they are used to using basic drawing paper and/or construction paper.

They drew their design onto the banana paper using pencil only. We discussed how they couldn't use eraser due to how fragile the paper was- they didn't want it to rip. Once the design was complete, they traced it with permanent black marker.

For color, we used water soluble oil pastels. 


If you have never used these, they are amazing! The students had 1 main rule to follow: the oil pastel is NEVER allowed to touch the banana paper! They used the oil pastel to color onto a piece of scratch paper. Using a wet brush, they treated this as their watercolor palette. In this way, they were able to get softer colors. I matted the finished products onto black construction paper and they look terrific!


Pin It