Saturday, June 25, 2011

Third Grade Big Mouth Fish

The third graders made big mouthed fantasy fish for their ceramics project. This is, of course, the project that they look forward to all year long....

I started off the project by reading them the book, Fidgety Fish by Ruth Galloway. We ended up having quite a lively discussion about what the word fidgety means and in what instances they become fidgety! It ended up being a very good teachable moment!

From there, the students got out their sketchbooks and they had the rest of class to draw 2 imaginary fish.
The criteria for this project:

1) had to be an imaginary sea creature (but could combine aspects of real ones)
2) had to have 2 textures
3) had to have 2 patterns

When they came in for the next class, I had a tray of clay slabs ready to go (I bought a heavy duty slicer- it looks like a large cheese slicer. I use this to cut all of my clay slabs. I can get them done in just a few minutes and they are all a uniform size. I rarely use my slab roller- it is too awkward for my students to use and I am always worried about their fingers getting caught).
I give each child a slab of clay and show them how to roll it like a taco (lots of giggles at this analogy). They have to smooth the edges together or it will crack when the clay dries.

Then they have to decide which end they want to be the big mouth and which end they want to be the tail.

The tail end gets close up and pinched together. They can then use their clay tools to cut out the shape they want their tail to be.
The mouth gets left open. Most of the students left it as an oval or a circle. I had a few adventurous students who tried making square and heart shaped
mouths.

Then I gave each student a ball of clay. They used this to add fins, eyes, teeth, tongues, etc.  I showed them how to score their pieces before attaching them (we lost a few eyes and teeth that were not attached well).

They used their tools (clay knives, Popsicle sticks, toothpicks, pencils, straws, etc) to add texture to their fish and then brought them to me as they finished up. I added their initials and class code to the bottom and then left them on their class shelf to dry.

After they had been fired, the students were ready to glaze.

I placed 6-8 different colors on each table and we talked about how they needed to cover the entire area that could be seen (they were NOT to glaze the bottom). They were also told to glaze the inside of the mouth. I reminded them 1 last time that I needed to see some sort of pattern on their fish and then they were off!

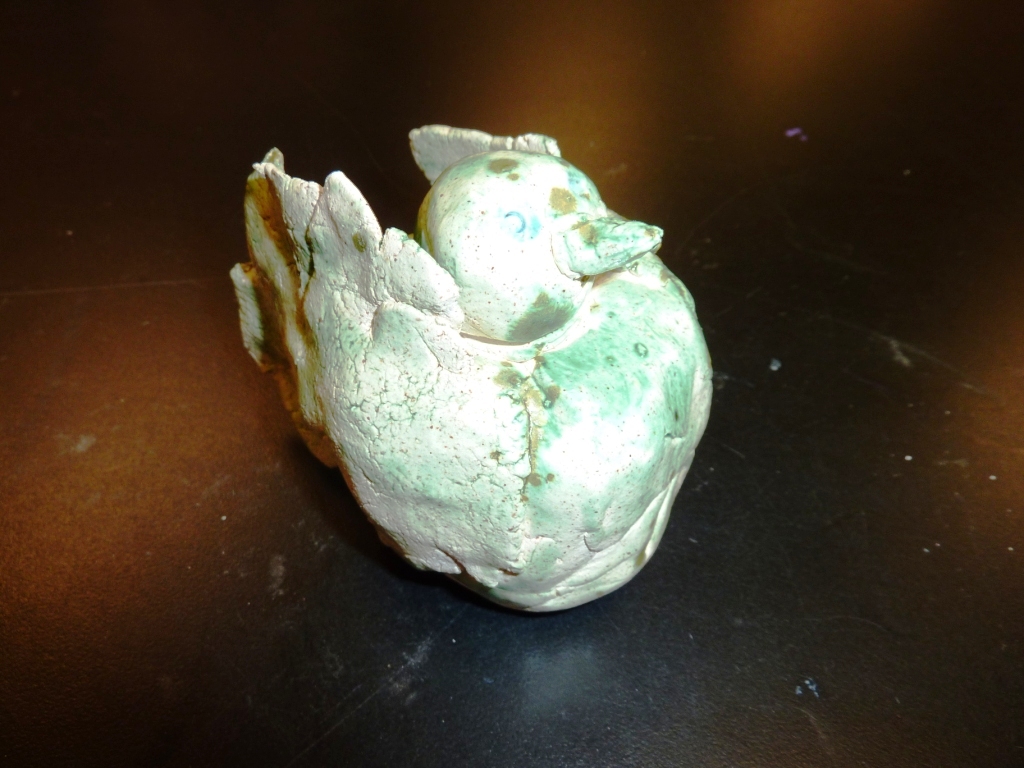
I fired them 1 last time and these are a few of the finished products. Pin It

Friday, June 24, 2011

Second Grade Rousseau's Jungle

 This project was a pretty simple one, but the end effects were very nice.

I started the project by reading the book, Who Is the Beast? by Keith Baker. The illustrations in the book were great for showing the students overlapping- which was what I wanted to focus on in this project.

Before I started reading, I gave the students 3 things to look for in the book:
1)   animals
2)   colors used in the plants
3)   shapes used in the plants and animals

After I finished reading, we brainstormed a list of animals that could be found in the jungle. The students then chose 2 animals and practiced drawing them in their sketchbooks (I have a milk
 crate filled with old calendar pictures that I have collected. I pulled all of the jungle animals and the students used these as their reference materials).

When they had finished their sketches, they chose the 1 animal that they liked the most and drew this on a piece of watercolor paper. The rules for this were:
1) touch at least 2 sides of the paper (to make sure that it was large enough)

2) use a whisper pencil (draw lightly, so that you can erase)


 After they drew their animal, I then showed them how to draw the vegetation. We talked about how Rousseau hid his animals in the plants, so we would have to draw our plants from the side of the paper towards the center, so that they would cover part of our animal. Anything that was covering our animal, we would then erase (thus the reason for using a whisper pencil).

Rules for this step:
1)   plants had to touch the animal

2)   had to have plants coming from the top, bottom and both sides of the page

I also told them that they didn't have to draw just leaves. I showed them pictures of different flowers that they could use, also.
 When they had finished their drawing, they used black marker to trace the entire picture and then colored in their animal and plants. I had bought every kind of Crayola marker imaginable (Bold, Tropical, Standard) so that they would have a variety of colors to choose from. They were asked to try and use each green only 1 time, so that they would have variety in their jungle.
 For the background, we used liquid watercolor to create a wash. I gave each child a cup with watered down blue watercolors and they painted in any areas that had not been colored with markers.

I love the contrast between the markers and the watercolor!
This last piece (the zebra) was voted as Artist of the Week on Artsonia (http://www.artsonia.com/). She won a $50 gift certificate to Dick Blick and a plaque with her name and a picture of her artwork on it!

She was thrilled. I sat with her and helped her order her art supplies- it was like Christmas morning when the box arrived! Markers, sketchbooks, oil pastels, glitter! Every child's dream! Pin It

Thursday, June 23, 2011

Second Grade Ceramic Birds

 One of 2nd grades big science units is Birds. So- we made ceramic birds!

I actually got this idea from a fellow art teacher in my district.

We started out by learning about John James Audubon. I couldn't find a book that was at a 2nd grade level, so we only got to look at artwork.

Then I had the students practice drawing different kinds of birds in their sketchbooks, focusing on the forms (cones, cylinders, spheres, etc).


The next week, was clay week! This in probably the students favorite time of the year. They look forward to clay and are constantly asking when we are going to do our clay project. So they were ready to go!!!

I gave them 2 pieces of clay and had them make 2 pinch pots (reminding them that we had made pinch pots when we were in kindergarten).

Then I showed them how to connect the 2 pots together by pulling the clay with their thumb from 1 pot to the other.
 Then they used their wet hands to smooth the form into a sphere. Some went with more of an ovoid shape (they wanted to make penguins).

I had them take their pencil and poke a hole in the bottom. We had a discussion about how the clay needed the hole so that it wouldn't explode in the kiln. They thought that was cool, until I explained that if 1 exploded, it would break the others around it- not so cool anymore!


I gave them a third piece of clay to make wings, head, beak, tail and any other features that they wanted to add to their bird.

I showed them how to score their pieces and we talked about what would happen if they were not properly attached.

As they finished them, they brought them to me, I used a paperclip to carve their initials and class code into the bottom and set them on their shelf to dry.
I fired the birds and then they were ready to glaze. For glazing, I had egg cartons that I had cut in 1/2 on each table. I tried to give each table a different combination of colors so that they would all look different.
Pin It

Second Grade Aztec Art

 This project was pretty much the same as the the third grade Illuminated Initials that I do, however, the second graders get a much smaller piece of copper. I really love the effect of the copper and the permanent markers.

I start this project out by reading the book Musicians of the Sun by Gerald McDermott to the classes.

While I am reading, I have the students focus on:
1)  the characters in the book (Night, Sun, Wind, Turtle Woman, Alligator Woman, Fish Woman)

2) lines and shapes used in the illustrations

3) colors used in the illustrations

After I am finished reading, I show them a PowerPoint that I put together with symbols for each of the the characters from the story. We talk about the Aztecs and where they were from. The majority of my school is from Mexico, so they absolutely LOVE this part!

Then they get to choose the character that they would like to illustrate.
I give the students a piece of 5 x 5 manila paper (the same size as the copper that they will get later on). I have them draw their character on the paper with the following rules:

1) it must touch all 4 sides of the paper (easier for some students than others)
2) it must have at least 1 pattern (using either shapes, lines or a combination of both)


When they finish drawing their character, they get a piece of copper and tape. I have them tape the manila paper onto the BACK of the copper (the copper is 36 gauge. It is copper on 1 side and silver on the other. I have them tape the manila paper to the silver side)

The place the copper with their drawing on top of their sketchbooks and trace their picture. For this part, we joke about how they have to use their muscles so that the picture will come through to the other side. The spend a lot of time flipping back and forth so that they can see it as it develops.

The students leave their picture taped onto their copper. I have them use their pencil and they color the image. The do not color their patterns.

When they have finished coloring their image, they flip it over and color the pattern on the copper side (this presses the pattern into the copper).

When they are completely finished, they have a bas relief of their Aztec image.

They use Sharpie markers to color the images. In the past, I have done a color lesson at this point, but I have found that letting them have freedom to use any colors makes for more dramatic end results.

These turned out so well, that I chose 1 from each of my 2nd grade classes to take to an art auction. I had them framed and it sold for almost $100. Pin It

Tuesday, June 21, 2011

First Grade Matisse Collages

 To start this project off, I read the book Oooh! Matisse by Mil Niepold to my first graders. They looked at each page and tried to figure out what Matisse was trying to make. We had some wild guesses! The book helped get them focused on looking at the shapes in Matisse's artwork.

Then I pulled out the artprint of "Beast of the Sea". Without giving them any information, they brainstormed what images they saw in the print.

After a few minutes, I told them to think of the ocean. This narrowed their ideas down quite a bit.

Then we made a list of all of the living and nonliving things that we might find in the ocean.
I gave the students a piece of white drawing paper (12 x 18). I had them fold their paper 2 times (giving them 4 rectangles).

They used their pencil to put a dot in the middle (where the rectangles met).

Then I had them choose 8 different colors of square paper (4 x 4). I showed them how to take their first square and use glue dots around the outside. They placed this square so that 1 corner was touching the dot in the middle of the paper and 2 edges were lined up with the folds in their paper.

They took their 2nd paper, glued it, placed it on their white paper so that it was touching the dot and lined up with the folds. They repeated this 2 more times, so that they had 4 squares of paper directly in the center of their paper.


 For the last 4 pieces, they glued them and placed them so that they were touching (lined up with) the fold in the paper and the paper that they had already glued down. They were not to let any white space show through.

This took us through to the end of our first class. We put our papers up to dry.

For the 2nd class, we started adding our sea creatures, plants, boats, etc.

At this point, I stressed that they were not allowed to use pencils at all! A few of them got very nervous about this. I had them name off 5 objects that they wanted me to demonstrate. I showed them how they could fold the paper to make a sea creature that had symmetry, how to use only their scissors to cut the shape (circle, square, oval, wiggly legs, etc) and then use glue dots to attach them to their paper.
2 rules for this part of the project:
1)   absolutely no pencils
2)   each square had to have at least 1 sea object (living or nonliving) in it

 For the last step of the project, I had bought some little shells that they used to add embellishments to their projects.

This was the highlight for them! They loved gluing real shells on their ocean pictures!


Pin It