Showing posts with label fourth grade. Show all posts

Saturday, November 24, 2012

Fourth Grade Masks

Last year's projects: African Masks


This year, I kept the project pretty much the same. However, the one adaptation I made was to have the students make their masks smaller. This helped on time, materials and storage space.


When decorating, they were allowed to choose their color scheme:

primary, secondary, or complementary

Everything that they put on their mask had to fit into that color scheme.


Pin It

Wednesday, September 26, 2012

Fourth Grade Sketchbooks

This year I had my fourth graders make a different sketchbook than usual (in the past, we used construction paper and manila paper- boring!). So this year, we branched out.

I had my faculty bring me all of their boxes (cereal, cracker, cookie, etc). I cut them so that they measured 9" x 12".


The students folded these in half.
 They used a ruler to mark off every inch and then used their scissors to make a snip at each line (easier for sewing- I tried it without the snips and it was very difficult to get the needle through cardboard and paper).
I gave them 10 pieces of plain white xerox paper and had them fold it in half. They used their ruler to mark every inch and snipped these, also.
The xerox paper was placed inside of the cardboard and the snips were lined up.
 I had found 2 trays of embroidery thread at a garage sale a few years ago for next to nothing (that will never happen again!), so we used that for sewing. I don't see why you couldn't use any thin string, though.
 I used size 13 tapestry needles for the sewing for a couple of reasons.

First, it was easier to get through all of the paper and cardboard.

Second, I didn't want anyone poking themselves with anything smaller.

These worked really well. I threaded the needles for them for time purposes, but you could always allow the students to do it themselves, if you have the time.

 The students used their threaded needle to sew their pages together. I did all of the knotting (again, time constraints).


I don't know if anyone has seen all of the fun duct tape that has come out lately, but I have been collecting it every time I go to Walmart. Each student was allowed to pick their tape and this was used to bind their book.


Then I had a collection of materials- stencils, markers, confetti, scrapbook paper, etc. They students used this to decorate their books and they were allowed to use Mod Podge if they wanted to.


Pin It

Monday, June 25, 2012

Fourth Grade Canopic Jars

Here are our projects from last year, including the wonderful YouTube videos that I show the students:


This year, I put together a PowerPoint:


And here are the finished projects:

Pin It

Fourth Grade African Drums

 This was the last project that the 4th graders did for the year. I will have the finished ones on display at the beginning of the year, when we go back to school in August.

I found the lesson plan on the Crayola website: African Drum

We began the project by looking at different examples of African drums.


Then I had them do a couple of sketches in their sketchbooks to show what they wanted their drum to look like.

They traced 2 circles onto muslin and cut them out. We used fabric markers to color the fabric and then I had them use a pencil to punch holes around the outside of the fabric so that they would be able to string their drum at the end.
The drums were made with 2 bowls. I used paper/cardboard bowls and they colored them with a random assortment of markers that I had collected throughout the year.

I had them punch 2 holes into the bottom of each bowl and then they tied the bowls together, so that they would not move.


When they were ready to string their drum, I had them glue the muslin to the bowl (the first class didn't do this, and had all kinds of difficulty with the fabric moving and falling off) and then they used string that I had left over to string the drums.

The very last step was to paint the fabric with a mixture of glue and water so that it would harden the fabric. Pin It

Monday, February 20, 2012

Fourth Grade Ndebele Dolls

I found this project on Artsonia. It is a project that Linda Welling at Cedar Creek Elementary posted. Funny thing is, I found this PowerPoint to show to my students and it is also from Linda Welling! I added in the YouTube video on the last slide.
I also found this great book, Ndebele: The Art of An African Tribe by Margaret Courtney-Clark. The book has some great pictures of the Ndebele people, their art and the dolls.

Fourth grade continued their tour of Africa by working on an Ndbele doll. They learned about the bead work and artistry of the Ndebele people. I showed them a doll that I had purchased and then they began their own designs in their sketchbooks.

They had a lot of fun with this one. It's been awhile since we have done a simple drawing project. We have been doing a lot of printmaking, collage and sculpture projects, so this was a return to basics for us.

The children decided what they wanted their doll to look like. My only requirement was that, like the Ndebele, they needed to have
at least 3 patterns somewhere on the doll.

Once the design was ready, they drew it on a large piece of drawing paper and traced it with black marker.

Now the fun part!!! They got to use Crayola Color Switcher markers. The majority of my students do not have art materials at home. The only time they get the chance to create is when they are in my room, so when they used the Color Switchers.... you would have thought I hung the moon!

Even better, they liked them so much, that they took better care of them than any other materials we have used thus far!!


Pin It

Saturday, October 15, 2011

Fourth Grade African Masks

Fourth grade's tour of the world is taking them to Africa this year. We started the year off with a very involved project that we are just now winding up- 9 weeks after school started!

I found this project on the Art for Small Hands blog (http://www.artforsmallhands.com/2009/11/papier-mache-african-face-masks.html) and adapted it to work for us. She does an amazing job explaining the entire process and I thank her for that!

We started out by looking at a variety of African masks to find a shape that worked for each student. I had cut pieces of poster board into 2" x 12" pieces and gave each child 2 pieces. They taped these together to form a circle. From there, they were able to create the shape that they wanted, whether it was a circle, oval, square, diamond, etc.

We created a grid of tape on one side of the mask and then filled the form with wadded up newspaper (the newspaper stuck to the tape, keeping it in place). Make sure that they fill their form in with newspaper- you do not want any empty spaces when you begin to papier mache.

Here is where we started to have some difficulties- my school gets really humid over the weekend (no air) and all of our masks were sitting in a warm, humid storage room. When I came back to school on Monday, I had a huge, sticky pile of poster board, newspaper and tape. They tape had come off of many of the masks! My suggestion is that before the students start filling their form with newspaper, take a stapler and staple the tape around the outside. This will help keep everything stable, especially if you live in the humid south, like I do!

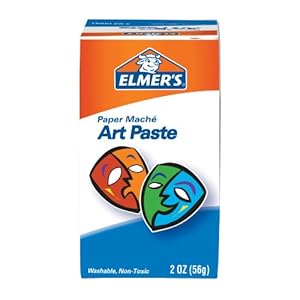
For the papier mache, I bought Elmer's Art Paste (we went through about 15 boxes of this) and mixed it up with 4 quarts of water. I put it into disposable storage containers for each table and they covered the newspaper with strips of newspaper/art paste.

I had them do at least 4 layers of papier mache to make sure that it would be strong enough when we took out the newspaper/tape backing.

As they worked on this, I was checking for sturdiness. Once it was strong enough, I gave them a check mark on the back. This let them know that they were ready to add a face.
For the face, I had bins of recycled materials ready: toilet paper rolls, water bottles, plastic caps, empty boxes, poster board scraps, etc. They used these materials to add eyes, nose, mouth, horns, etc. They taped the facial features on and then had to do at least another 2 layers of papier mache.

Once everything was ready, they used their scissors to cut the tape on the back and pull out all of the wadded up newspaper, leaving the form of their mask intact.

For this part, we again looked at examples of masks and noted the colors. Most of the masks that we looked at were 1 or 2 colors and the colors were muted. I gave them the guidelines that they could use 2 colors max and that they had to create a tint or shade of the colors that they chose.

They painted their entire mask with 1 color first and then used a smaller brush to add any patterns and designs that they wanted.

I then pulled out all of my feathers, shells, Mardi Gras beads, sequins, etc and gave a lesson on glue gun safety. Then they decorated their masks, trying to stay with their color scheme in their decorations (easier for some than others- so many fun things to decorate with!)


Pin It