Friday, July 29, 2011

Tall Tales in Art- Weaving a Rainbow


Our next book for our summer program was Weaving a Rainbow by Georgia Ella Lyon. This book goes through the process of how a woman raises sheep, shears them, cards and spins the wool, dyes the yarn, and weaves it at a loom.


For our projects, the 2-5 year olds wove a variety of materials onto a pre-made cardboard loom. We had made the looms out of recycled cardboard: cereal boxes, frozen pizza boxes, cracker boxes, etc. Slits were cut in the top and bottom, about1 inch apart and yarn was wound around the cardboard. This was done before the class so that they were ready for weaving when the children and their caregivers got there.

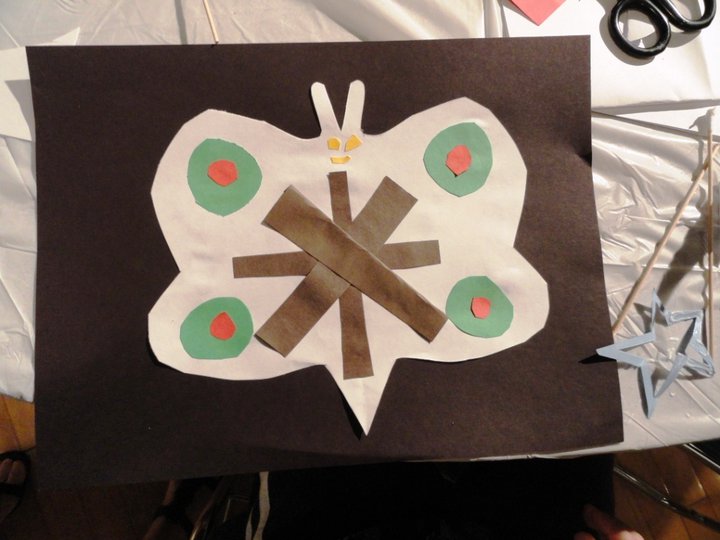
Then we had a huge supply of materials ready to weave: yarn, ribbon, Mardi Gras beads, colored wire, felt strips, etc and they wove "over, under, over, under" to complete a very colorful, textured piece of art. And of course, for this age group, nothing would be complete without gluing something on, so we got out the glue and many of them glued silk flowers to finish them off.


The 6 and 7 year olds took a piece of paper and folded it 2 times, creating 4 squares. They colored each square a different color with watercolor markers. I had plastic leaf prints that I had bought from Sax that they used to print onto each square, using silver printing ink.

We got out the blow dryers to dry the ink and then cut our loom. Once the loom was cut, the children wove sticks throughout it.


The 8 and up group did a Pollock-ish project. They turned their papers over first and drew lines on the back so that they would know where to cut their strips for weaving. Then they were taken outside to splatter paint 2 pieces of paper with tempera paint. We mainly used fluorescent colored paint for this. Once they had 2 pieces painted, they came back into the museum and they used blow dryers to dry their papers.
When their papers were dry, they cut the papers apart and started weaving them back together. They used masking tape to hold them together.

These turned out amazing!! They were very proud of their paintings!
Pin It

Thursday, July 28, 2011

Tall Tales in Art- Velma Gratch and the Way Cool Butterfly

 For the third week of our summer program, I read the children the book velma gratch & the way cool butterfly by Alan Madison.
Velma is a first grader, with two older sisters. Everyone at her school remembers her sisters, but no one ever remembers Velma. She tries different ways to get herself noticed by her teachers. She finally finds something that her sisters never learned about- BUTTERFLIES! Her class takes a trip to the butterfly conservatory. Velma has a monarch butterfly land on her finger and it won't leave! No one will ever forget this!
If you have never read this book, I highly recommend it! We tied in a little science before we got started on our art projects and what child (and adult) doesn't
love butterflies? There is great vocabulary in the book and the children loved the way Velma went about learning the new words.

The 2-5 year olds then did a painting project with their caregivers. They folded a piece of paper in half and cut out 1/2 of a butterfly.

They opened the paper and painted on only one side.

We made sure to put out fluorescent colors for this
 project.

This project worked out well for the little ones. Aside from being a little messy, they just had to cover the paper with paint.

When they finished, they re-folded their paper and rubbed it really well to transfer the paint to the other half of the page.

When they opened them up, it was priceless to see little eyes get huge! It was like magic had taken place on their paper!
I had a few blow dryers handy for the volunteers to help the kids dry their paint (usually I would put them on a drying rack, but this program is only and hour and a half, no time for allowing paint to dry!).

Once the paint was fairly dry, they glued the butterfly shape onto a piece of construction paper and then started adding details: legs, eyes, antenna, etc.

I had pipe cleaners, construction paper, scissors, glue all handy for them to use.
 The results were absolutely gorgeous! The fluorescent colors really added to the overall effect of the project.

 The 6 and 7 year olds made butterfly molas.

They started out by cutting a butterfly shape (the same way the younger group did) and gluing it onto a piece of construction paper.

Then I had pre-cut pieces of construction paper into 3" x 4" pieces and the student were shown how to cut circle, triangle, ovals, etc.

They learned how to cut multiples of one shape by folding their paper or placing 2 or 3 pieces together.

 As they cut their pieces, they used school glue to glue the pieces onto their butterfly.


The 8 and up group made mosaics. They also cut out a butterfly shape and glued it onto another piece of paper.
I had bought bags of mosaic paper and the students used these to glue onto their buttefly. They used scissors to cut the pieces if they were too big or if they needed triangles.


Pin It

Wednesday, July 27, 2011

Summer Art Program- Willow

For the second week of our summer art program, I read the book Willow by Denise Brennan-Nelson, Rosemarie Nelson and Cyd Moore to the children. This book is a great book for talking about creativity!

All of the students in art class are taught to draw everything exactly alike. However,  Willow, paints what she sees when she closes her eyes. The unimaginative art teacher does not like Willow's way of looking at things. At Christmas the only gift Miss Hawthorn receives is from Willow. Willow gives her art teacher her beloved sketchbook, which begins a change in the unhappy teacher. When the children come back to school in January, they discover an art room and an art teacher who have gone through an extreme transformation!

The projects for this book focused on imagination and creativity! The 2-5 year old group created name creatures. The caregivers helped them fold their paper in half and write their names with a soft-leaded pencil. Then rubbed them so that they could transfer their name onto the other half of the paper, creating a mirror image of their name.

One they had this, the kids took over creating their creatures. They used markers, colored pencils, crayons to color them in.

Since the little ones love to glue, I put out a variety of feathers, sequins, precut paper and glue bottles and let them go for it- decorating their creatures the way they wanted.

The 6 and 7 year olds did personal silhouettes. They had a choice of whether they actually wanted to trace their own silhouette or use a precut doll shape (it was pretty much 50/50 on this). They cut them out and glued them onto colored construction paper.

Then they used a variety of materials to glue onto the silhouettes to describe themselves.

They could also use markers, crayons and pencils to draw things that told about themselves.

This was probably my favorite project all summer!!! Shoe sculptures! A friend of mine called everyone in her neighborhood and they cleaned out their closets for this project- Thank you!!!!

The 8 and up group took a shoe and reimagined it, creating a unique sculpture.

For this, I had cardboard cut for them to use as a base. I had felt, tissue paper, scrapbooking paper, silk flowers (from the dollar store), Mardi Gras beads, Popsicle sticks, etc.


Pretty much anything you can think of would work. I walked around the dollar store and filled up a basket with random things.

I had lots of Tacky Glue, but I also had some glue guns handy, too. We had high school volunteers and caregivers that were available to help with the glue guns.
I found all 3 of these lessons on Artsonia. The shoe sculptures were geared towards middle or high school, but my 8 and up group did really well with it and came up with some great ideas!!! The lobster was my favorite. This little boy had just gone to Galveston for the weekend. He had been crabbing and began his sculpture as a crab. As he progressed, he noticed that it was too long, so it morphed into a lobster. Life experiences! Pin It

Tuesday, July 26, 2011

Tall Tales in Art- Summer Art Program

I was fortunate enough to be asked to direct a summer art program at our district art museum this year. The theme- Tall Tales in Art. Basically- link art with children's literature. Right up my alley! I do this in my classroom all the time!

Our program was for 6 Tuesdays, from 10:00 until 11:30 am. and I had students ranging in age from 2 years old all the way up to 12 years old. I divided the children into 3 groups: 5 and under, 6 and 7, 8 and up.

The caregivers pretty much stayed with the youngest group, helping them with the scissors, glue, paint, etc. The older groups had a few caregivers with them, depending on whether they had younger siblings with them or not.


 For our first week, we started out by reading the book, Go To Bed, Monster. The entire group of children and adults gathered in a central gallery and I read the book to the entire group.

After that, I showed them examples of what they would be working on. The youngest group made paper plate monsters, using a wide variety of materials (felt, tissue paper, Styrofoam balls that were cut in half for the eyes, pipe cleaners, etc). They highlight for this group every week was GLUE!!!!! 2 year olds and glue, that was all they wanted to do. It was funny to watch the panic on 
 the mom's faces.

The 6 and 7 year olds made water bottle monsters. Again, using a wide variety of materials.

I didn't get any pictures of the 8 and up project. They traced their shoes and made them into shoe print monsters, using crayons, colored pencils and markers.

For our first week, we had about 60 students and probably about 30 adults. It was a full house!

Pin It

Monday, July 25, 2011

Fifth Grade Ceramic Picasso's

This was the fifth graders last project of the year.

We studied about Picasso and looked at his variety of portraits, focusing on how he combined profiles with the front view to make a single portrait.

I had the students draw the portrait that they wanted to create first. I really stressed that there was no right and no wrong way to do this. I suggested that they try to combine a frontal portrait with a profile, but that they did not have to.


The two rule that I did have for them were:
1) must have pattern or texture (or both)
2) must be 3 dimensional (they had to use clay to build the face up somehow

I then gave them a pre-cut slab of clay. I rarely use my slab roller anymore. I bought a large cheese slicer and I use that to cut all of my slabs. It is so much easier and less time consuming than using a slab roller!

The students used their clay tools to cut out the shape that they wanted for their face. They used the extra clay that they had from cutting out the shape
of the face and built the eyes, mouth, hair, etc. I had dollar store garlic presses that they used if they wanted to add hair.

We found that the hair looked really cool, but once it was fired, the hair had a tendency to break off- I need to find a better way to do this. If there are any suggestions out there, I would love to hear them!

I had a wide variety of texture plates out for them to use, if they wanted. Some went crazy with texture, others did not.

When they were ready to go, I fired them and then they were ready to glaze.
 I showed the students how they could divide their face into different sections and glaze each section a different color- they loved this, because it meant that they could use more colors!!

Unfortunately, since this was our last project of the year, I was unable to put these on display throughout the school. The rest of my faculty did not get a chance to see these amazing ceramic pieces. That will teach me to leave my clay project until the end of the year! Poor planning on my part!
Pin It