Leaving for TAEA convention today in Dallas. Looking forward to 4 days of like-minded educators, art, exhibit tables and fun!
A little nervous about doing a presentation for the first time- even if it is on a small scale. Luckily, I am going first. Tomorrow, 8-9 am and done! Then I can enjoy the rest of the weekend without worries.
If you are in Texas and you are heading up to Dallas for the convention, stop by the Simple Sketchbooks Walk-Up table and say hi! I believe I will be on the second floor.
Will post pictures on my return.
Pin It
Thursday, November 21, 2013
Tuesday, November 12, 2013
Choice Based Art Education
I am looking for some help/advice/information from all of you art educators out there....
I am beginning to do some research on Choice Based Art Education. This is something that I would really like to implement at my school. I am easing into it this year, by giving the students a variety of options in their final products. I have not been able to give up complete control... yet. It is a learning process for me and for the students.
What the students have been creating so far this year has been wonderful and I would really like to learn more about fully implementing it next year.
Are there any of you who already do this??
It strikes me as very similar to the way I taught when I was in the content classroom (K-6 and multi-age) and I would love to get back to it! It seems like a very natural way of teaching. Ideas, suggestions???
Pin It
Monday, November 11, 2013
Retirement Centerpiece

Since we were working on such short notice, it had to be something that could be worked on before school (I pulled a handful of students who are here early) and it had to be something that I had materials handy for.
Ceramics!

I have these cute little sun molds that the students used to add decorations to the outside of the bowl.
It dried pretty quickly, so I was able to fire it within a couple of days of building the bowl.
Once it was fired, the students chose the colors for glazing.

They wanted it to be bright, happy and colorful- blue, red, purples, yellow and orange!
I fired it one more time and am quite happy with the results of our spur of the moment, 1 week project!
I just happened to have some paper mache fruit that my first graders had finished for our Cezanne project.... Ta da! A retirement centerpiece!


Pin It
Tuesday, November 5, 2013
Kindergarten Monsters
This was the second project with my kindergartners where I had choices set up in stations for their project.
Pin It
I began by reading them one of my new favorite books, I Need My Monster by Amanda Noll. Once we were done with the book, the students were shown all of the projects. I had each project set up at a station with 8 spaces available. Once the spaces were filled, the station was closed to anyone else.
Station 1:
Sponge painting monster-
Students had a tray of paint with sponges. They used the sponges to create a general monster shape on a piece of construction paper.
For the second class, they used a basket of sequins, foam shapes and beads to decorate and add eyes, horns, fingers, etc.
The last day was used to add a variety of lines to their monsters: zig zag, wavy, straight, etc using construction paper crayons.
Station 2:
Marker monsters-
Students drew a monster with pencil and then traced it with black marker. They used the black marker to add lines (wavy, zig zag, etc).
The next class was used to color their monsters with markers.
The last day they decorated their monsters with sequins, foam shapes and beads.
Station 3:
Coffee tin monsters-
Students made a monster out of an International Coffee tin (one of our teachers donated 3 large boxes full of these wonderful tins- with their lids!). I used scissors to cut a mouth shape for the students and then they painted the tin with tempera paint.
The 2nd day was used for decorating with sequins, foam shapes and beads.
The last day, they used construction paper crayons to add lines.
Wednesday, October 2, 2013
1st Grade Picasso's
I had such success with the first grade Picasso's last year, that I did not change the project for this year.
We looked at a variety of portraits painted by Picasso and then drew our own. The students were allowed to choose if they wanted to use liquid watercolor, oil pastels or Crayola Color Sticks.
See last year's post for more info: 2012 Picasso Portraits
Here are examples of this year's finished products:


Pin It
Wednesday, September 18, 2013
Technology ideas needed
I just had a grant funded from Donor's Choose for 4 Samsung tablets. This will give me a total of 5 Netbooks and 4 tablets in my art room.
I am in the process of coming up with projects for my students to do with this plethora of technology that I will now have...... I can't wait!!!!
Does anyone have any ideas/suggestions for projects that my students can do? I have had the Netbooks for awhile and have worked with these as a center, but now I think that I can actually do some amazing things with what I will have available.
Help!!! Please!!
Pin It
Tuesday, September 17, 2013
Kinder Art Eyes
I have done this before with kindergarten, but this year, the students were offered choices in their projects.
We started out by talking about our eyes and what we use them for. Then we talked about how an artist uses their eyes: looking at shapes, colors, lines, etc.
The project was for each child to make their own Artist Eyes. Stations were set up for the children and they chose which station they wanted to go to.
***Disclaimer- I am starting the year with a student teacher (a wonderful young lady who was actually with me for the Spring semester last year in an observing capacity- she was actually teaching most of the classes by the end of the year), she has been a great help getting little kinder students into stations, making sure they stay in their station and clean up when they are done. By the time she is finished with her student teaching and leaves me, the students will have a good understanding of the procedures.

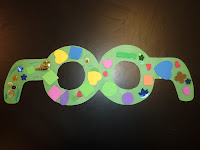
The first station was decorating a set of art glasses. In the past, I had students cut these out themselves before decorating. This year, we gave them pre-cut glasses and gave them the entire time to decorate. They were given a box with a variety of materials (sequins, foam shapes, crayons, etc). They used regular school glue to attach their materials.

The second station was a painting station. They students used tempera cakes to paint a large eye on their paper, using a wide range of colors. They learned how to keep the colors pure, clean their brushes, wipe them on the edge of their water container and clean their materials when they were finished.
 The third station was a sculpture station. The students were given a set of egg cartons (cut into sets of 2) and a variety of materials (pipe cleaners, sequins, foam shapes, permanent markers). They used craft glue to attach their materials to make a set of googly eyes.
All of these went on display for Open House when we were finished.
 The follow up activity to this was using our own Artist Eyes to look for things in art prints. Tables were given an art print and a list of shapes and colors (the list was laminated). They had a dry erase marker and a sock. Their task was to count the number of squares in the art print and write the number on the shape on the list. They went through the entire list, counting and writing numbers (excellent math practice for beginning of the year kinders) and then got to erase the numbers when they had filled their list.


Pin It
We started out by talking about our eyes and what we use them for. Then we talked about how an artist uses their eyes: looking at shapes, colors, lines, etc.
The project was for each child to make their own Artist Eyes. Stations were set up for the children and they chose which station they wanted to go to.
***Disclaimer- I am starting the year with a student teacher (a wonderful young lady who was actually with me for the Spring semester last year in an observing capacity- she was actually teaching most of the classes by the end of the year), she has been a great help getting little kinder students into stations, making sure they stay in their station and clean up when they are done. By the time she is finished with her student teaching and leaves me, the students will have a good understanding of the procedures.

The first station was decorating a set of art glasses. In the past, I had students cut these out themselves before decorating. This year, we gave them pre-cut glasses and gave them the entire time to decorate. They were given a box with a variety of materials (sequins, foam shapes, crayons, etc). They used regular school glue to attach their materials.

The second station was a painting station. They students used tempera cakes to paint a large eye on their paper, using a wide range of colors. They learned how to keep the colors pure, clean their brushes, wipe them on the edge of their water container and clean their materials when they were finished.
 The third station was a sculpture station. The students were given a set of egg cartons (cut into sets of 2) and a variety of materials (pipe cleaners, sequins, foam shapes, permanent markers). They used craft glue to attach their materials to make a set of googly eyes.
All of these went on display for Open House when we were finished.
 The follow up activity to this was using our own Artist Eyes to look for things in art prints. Tables were given an art print and a list of shapes and colors (the list was laminated). They had a dry erase marker and a sock. Their task was to count the number of squares in the art print and write the number on the shape on the list. They went through the entire list, counting and writing numbers (excellent math practice for beginning of the year kinders) and then got to erase the numbers when they had filled their list.


Pin It
Saturday, September 7, 2013
TAEA convention in November
Our state convention is coming up in November (Texas Art Education Assoc). I look forward to this event every year and this year is no different. I love seeing other art educators all in one place and getting new ideas from amazing teachers!
This year, however, will be something new for me. I just volunteered to do a walk up workshop at convention..... Not a full-blown workshop, but one of the mini workshops that are set up in the hallway on your way to the big ones. However, for anyone who knows me.... you know that public speaking (except in front of children) is not my thing!! At all! I have nightmares about it! My speech class in college was enough to scar me for life!
Anyway, I am trying to overcome this phobia and am taking baby steps. I am going to do a mini workshop on sketchbooks. I do 4 different types of sketchbooks with my students and I will be sharing this at convention. Unless I panic and back out..... Pin It
Friday, August 23, 2013
Brand New School Year
A new school year is about to begin and I am just putting the finishing touches on my room. We have Meet the Teacher this afternoon and then the children come back on Monday!
Here are a few photos of my room this year. I have made a few changes- thanks to the wonderful posters on Pinterest- and thanks to my amazing student teacher, we have been able to update and redo a few of the visuals.

 This is my organizational board. On the far left is a flip chart for all of my classes. It is divided by tables (each table is labeled with an artist) and each table receives points during class time: working quietly, cleaning, helping each other, etc. At the end of 9 weeks, the table with the most points get to choose reward coupons from the pink basket (below the flip chart). These are rewards such as: sit in the teacher chair for the day, sharpen all of the pencils, sit by your friend, Tech Time, pick a prize from the box, etc. Most of the rewards are FREE and require little to no time.
Next to the flip chart is my job board. I have 4 jobs: Distributor/Collector (passes out and collects materials), Polisher/Dryer (cleans and dries table), Expert (listens extra hard, so they can help anyone at their table who needs it), Tree Hugger (empties the trash bins on the tables and sweeps the floors under the table)
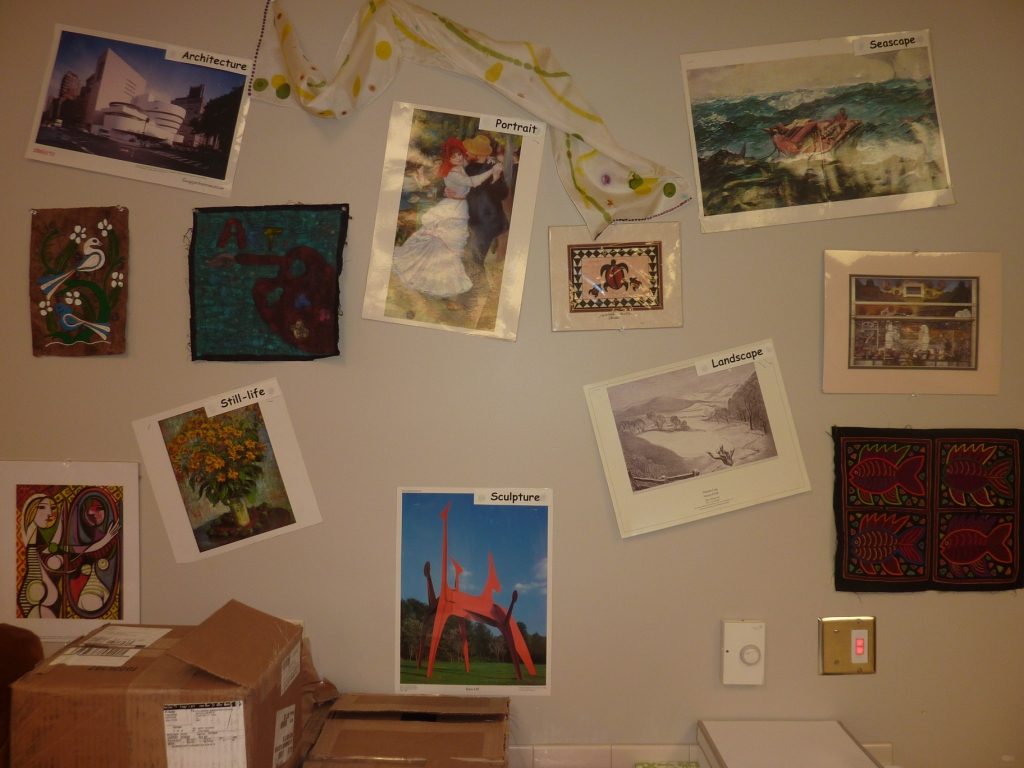
The yellow paper is a list of choices that the students have when they are finished working: work on any incomplete projects, choose a project from the file box (I have a file box full of simple projects that they can work on independently), go to my classroom blog, work on a research project, answer artprint questions (I have an artprint posted with 3 questions that require research. They write their answers and then I draw a winner to receive a prize from the Art Awards), projects for Ms. Mary (I always have odd jobs for the students to work on (sorting crayons, making art passes, etc).

Each table corresponds with an artist on the point chart.
I have also place a piece of colored tape on each leg of the table. The students will be responsible for the job that corresponds to that color.

Steps for getting ready to paint are posted next to the paint shirts.
 The Mona Lisa Rules:
Hands in your lap
Ears listening
Lips quiet
Eyes on the teacher

My student teacher made the shape and texture posters for the room.

Color- color wheels, color schemes, color value.
I have a large box of donated crayons that the students will begin sorting by color when they finish early. Then when they are looking for a particular color, they will be able to find it quickly.
I am going to do the same with the markers that have been donated.

My drying rack is separated by grade level. That way, I do not have to stand there and show the students where to put their papers. They find their grade level, put their paper up to dry and then I can pull them out when they are dry and put them into their class folders.
I have also color coded each grade level and put poster board on the shelves, so the students can see the colors.
 I have 3 sinks in my room. I know, I am extremely lucky!!!! I purchased dollar store dish drainers and they children put their brushes, cups, palettes into the drainers when they are finished washing them. At the end of the day, I pull them out and sort them.

Each table has a basket with scissors, glue, crayons and a drawing book. The drawing book has pages on the Elements of Art and the Principles of Design. This is a quick resource for the children to use in their projects.
Each table also has a trash bin which the Tree Hugger will empty out at the end of class.
 Each table also has wet towels so the Polisher/Dryer can clean at the end of class.

 This is my counter by the door. The paint can has passes for the students. The students sign out on the cookie sheet, as they are leaving (in case of fire drills).
When they come back, they erase their name.
 My student teacher made all of the passes.

My faculty is very generous when I ask for donations. I have set up bins outside of my room so that they can drop off anything that they are bringing to the artroom.
They children have learned that when they are doing projects, they are welcome to check the bins for any materials that might fit their needs.
Even teachers have come and used materials for their lessons.
 An easel that I have outside of my room with my daily objectives written.
I learned quickly that it needed to be covered. Little fingers love dry erase boards! I bought clear shower curtains and cut them to fit and then used Velcro dots to attach it to the easel.

I know all of you receive artwork that the children have done at home. I never have a place to display this artwork, so this year, I created a bulletin board, just for that special artwork that the children take time to create at home.
 Projects from last year that I saved for displaying this year: African drums and Australian didgeridoos.


Pin It
Here are a few photos of my room this year. I have made a few changes- thanks to the wonderful posters on Pinterest- and thanks to my amazing student teacher, we have been able to update and redo a few of the visuals.

 This is my organizational board. On the far left is a flip chart for all of my classes. It is divided by tables (each table is labeled with an artist) and each table receives points during class time: working quietly, cleaning, helping each other, etc. At the end of 9 weeks, the table with the most points get to choose reward coupons from the pink basket (below the flip chart). These are rewards such as: sit in the teacher chair for the day, sharpen all of the pencils, sit by your friend, Tech Time, pick a prize from the box, etc. Most of the rewards are FREE and require little to no time.
Next to the flip chart is my job board. I have 4 jobs: Distributor/Collector (passes out and collects materials), Polisher/Dryer (cleans and dries table), Expert (listens extra hard, so they can help anyone at their table who needs it), Tree Hugger (empties the trash bins on the tables and sweeps the floors under the table)
The yellow paper is a list of choices that the students have when they are finished working: work on any incomplete projects, choose a project from the file box (I have a file box full of simple projects that they can work on independently), go to my classroom blog, work on a research project, answer artprint questions (I have an artprint posted with 3 questions that require research. They write their answers and then I draw a winner to receive a prize from the Art Awards), projects for Ms. Mary (I always have odd jobs for the students to work on (sorting crayons, making art passes, etc).

Each table corresponds with an artist on the point chart.
I have also place a piece of colored tape on each leg of the table. The students will be responsible for the job that corresponds to that color.

Steps for getting ready to paint are posted next to the paint shirts.

Hands in your lap
Ears listening
Lips quiet
Eyes on the teacher

My student teacher made the shape and texture posters for the room.

Color- color wheels, color schemes, color value.
I have a large box of donated crayons that the students will begin sorting by color when they finish early. Then when they are looking for a particular color, they will be able to find it quickly.
I am going to do the same with the markers that have been donated.

My drying rack is separated by grade level. That way, I do not have to stand there and show the students where to put their papers. They find their grade level, put their paper up to dry and then I can pull them out when they are dry and put them into their class folders.
I have also color coded each grade level and put poster board on the shelves, so the students can see the colors.


Each table has a basket with scissors, glue, crayons and a drawing book. The drawing book has pages on the Elements of Art and the Principles of Design. This is a quick resource for the children to use in their projects.
Each table also has a trash bin which the Tree Hugger will empty out at the end of class.


When they come back, they erase their name.


My faculty is very generous when I ask for donations. I have set up bins outside of my room so that they can drop off anything that they are bringing to the artroom.
They children have learned that when they are doing projects, they are welcome to check the bins for any materials that might fit their needs.
Even teachers have come and used materials for their lessons.

I learned quickly that it needed to be covered. Little fingers love dry erase boards! I bought clear shower curtains and cut them to fit and then used Velcro dots to attach it to the easel.

I know all of you receive artwork that the children have done at home. I never have a place to display this artwork, so this year, I created a bulletin board, just for that special artwork that the children take time to create at home.


Pin It
Wednesday, August 7, 2013
Back to school- 2013
Well, it's that time of year.... again.
Is it just me or does summer vacation go by faster and faster every year???? It seems like just last week that I was closing down my room and getting ready for a restful summer. Now I am loading up my car with all of the materials that I brought home and heading back to get myself organized for the year!
I have spent the last couple of days going through the blogs that I follow, Pinterest, Arts and Activities and School Arts magazines looking for new, exciting and innovative ways to organize and make myself more efficient this year. With 800-850 students (PK-5 grade), I need to be as on top of things as I can possibly be.
I have found quite a few ideas that I plan on trying out- check out my Artroom Organization board on Pinterest .
Here is my question for all of you teachers out there......
What new ideas do you plan on putting into effect for this new school year? Do you have any tips and tricks for behavior, organization, grading, things for the students to do when they are done, etc.
Please share your ideas and/or send a link to your Pinterest or blog. I am always open to new ideas!!! Photos are always appreciated, too!
Have a wonderful school year!!!
Pin It
Tuesday, July 16, 2013
First Grade Starry Night Cityscapes

Then we made our cityscape by printing with white acrylic paint and recycled tools (corrugated cardboard, tape rolls, toilet paper rolls, blocks, etc).
The students needed to start their city at one side of their paper and continue over to the other. We talked about how the buildings could be different heights and how they should have windows, doors, etc.
The next week, they created the background with a black piece of construction paper and oil pastels. Each table had a selection

They cut out their cityscape and glued it onto their background.
To give it a little bit of sparkle, I let them glue sequins onto the sky for their stars.


Pin It
Subscribe to:
Posts (Atom)