Saturday, October 15, 2011

Fourth Grade African Masks

Fourth grade's tour of the world is taking them to Africa this year. We started the year off with a very involved project that we are just now winding up- 9 weeks after school started!

I found this project on the Art for Small Hands blog (http://www.artforsmallhands.com/2009/11/papier-mache-african-face-masks.html) and adapted it to work for us. She does an amazing job explaining the entire process and I thank her for that!

We started out by looking at a variety of African masks to find a shape that worked for each student. I had cut pieces of poster board into 2" x 12" pieces and gave each child 2 pieces. They taped these together to form a circle. From there, they were able to create the shape that they wanted, whether it was a circle, oval, square, diamond, etc.

We created a grid of tape on one side of the mask and then filled the form with wadded up newspaper (the newspaper stuck to the tape, keeping it in place). Make sure that they fill their form in with newspaper- you do not want any empty spaces when you begin to papier mache.

Here is where we started to have some difficulties- my school gets really humid over the weekend (no air) and all of our masks were sitting in a warm, humid storage room. When I came back to school on Monday, I had a huge, sticky pile of poster board, newspaper and tape. They tape had come off of many of the masks! My suggestion is that before the students start filling their form with newspaper, take a stapler and staple the tape around the outside. This will help keep everything stable, especially if you live in the humid south, like I do!
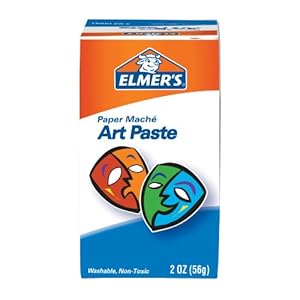
For the papier mache, I bought Elmer's Art Paste (we went through about 15 boxes of this) and mixed it up with 4 quarts of water. I put it into disposable storage containers for each table and they covered the newspaper with strips of newspaper/art paste.

I had them do at least 4 layers of papier mache to make sure that it would be strong enough when we took out the newspaper/tape backing.

As they worked on this, I was checking for sturdiness. Once it was strong enough, I gave them a check mark on the back. This let them know that they were ready to add a face.
For the face, I had bins of recycled materials ready: toilet paper rolls, water bottles, plastic caps, empty boxes, poster board scraps, etc. They used these materials to add eyes, nose, mouth, horns, etc. They taped the facial features on and then had to do at least another 2 layers of papier mache.

Once everything was ready, they used their scissors to cut the tape on the back and pull out all of the wadded up newspaper, leaving the form of their mask intact.

For this part, we again looked at examples of masks and noted the colors. Most of the masks that we looked at were 1 or 2 colors and the colors were muted. I gave them the guidelines that they could use 2 colors max and that they had to create a tint or shade of the colors that they chose.

They painted their entire mask with 1 color first and then used a smaller brush to add any patterns and designs that they wanted.

I then pulled out all of my feathers, shells, Mardi Gras beads, sequins, etc and gave a lesson on glue gun safety. Then they decorated their masks, trying to stay with their color scheme in their decorations (easier for some than others- so many fun things to decorate with!)


Pin It

Fifth Grade Russian Nesting Dolls

My 5th graders are traveling to Asia for their art room projects this year. Our first stop was Russian Nesting Dolls or Matryoshka dolls.

I had them draw out at least 3 dolls in descending order that related to each other in some way.


They started out with the large doll and made 2 pinch pots. Some of them added ears, noses, etc, but the majority had the basic pinch pot. Then they made the middle pot and the baby pot.


Once they were fired, I decided not to use glaze on them and we used extra-fine point Sharpies to draw out our details onto the clay.


They used watercolors to paint them. I have a few that I am thinking of using in shows later this year and I might have those students varnish them to give them a more finished look. Pin It

Sunday, October 2, 2011

Salvador Dali Clocks

Our district's art museum (Altharetta Yeargin Art Museum http://cms.springbranchisd.com/Default.aspx?alias=cms.springbranchisd.com/ayam) has begun their annual First Saturday's Art Programs. The theme this year is "From Rembrandt to Warhol, Great Artist and Their Art". For the month of October, the focus was on "Modern Masters"-  Picasso, Dali, Matisse, Van Gogh etc.

My sessions were based on Salvador Dali and his painting "The Persistence of Memory".

I found this great video (http://www.videojug.com/film/how-to-make-a-salvador-dali-clock) on how to make a clock out of an old record album. The video used an oven at 200 degrees. Since we were doing this activity in a classroom, I pulled out all of my old electric skillets (used for melting crayons to batik) and filled them with water. I set them at about 200-250 degrees it worked just as well as heating the albums in the oven.

I had a friend who donated all of her old 80's albums for this project, so I didn't need to worry about that expense. The one thing that I did have difficulty with was finding inexpensive clocks! I hit up every resale shop, Salvation Army and dollar store in my area and found that clocks are not cheap. I did have a few clock donated, which helped out a lot.

The clocks were taken apart ahead of time, but for an older group of students, I don't see why they couldn't learn  how to take them apart themselves. You will need to have some screwdrivers and pliers handy.

Probably the most difficult thing was choosing which album to use. Many of the adults went with the nostalgia factor and there were others who chose their album by the artwork on the album. The children didn't really have difficulty, except for the fact that many of them didn't know what an album was- oh, it makes me feel so old!! When I told them that this is how we listened to music before we had CDs, I even had a couple ask me what a CD was! That gave me a good laugh- I hadn't even thought of how some children have only ever listened to music on their iPods and MP3 players. Wow!

In class, I showed the students (for out 1st Saturdays program, many of the students are adults, which is a nice change for me) how to melt the clock and form it with their hands while it was still malleable. They could always put it back into the water to reheat it if they didn't get the desired bend.

Then I had metallic markers out for them to decorate. The metallic looked really nice against the black vinyl.

Our last step was adding the clock mechanism. Once they were put together, they used a glue gun and attached the battery compartment to the back of the album. Pin It

Friday, September 30, 2011

Second Grade Day of the Dead Calaveras

 Second grade is traveling to Mexico, Central America and South America in the art room this year. For our first project, they created their very own Day of the Dead (Dia de los muertos) Calaveras (skulls).

This worked out well for my 98% Hispanic school. The students were actually able to give me information about the holiday that I didn't know.

We started out by looking at a variety of calaveras to get their creativity flowing. They made a quick drawing in their sketchbook to show what they wanted it to look like.

Then came the fun part. If you have never worked with Claycrete before- I highly recommend it! I order mine from Sax 
and a 20 lb box is usually enough to get me through an entire grade level. I give each student their own individual bowl with a heaping 
handful of Claycrete. I pour about 3/4-1 cup of water into it and about 3 tbsp. of glue. They use their hands to mix it up really well. I go around with a pitcher of water and add water to the bowls that are too dry. It should not be dripping wet, but the entire mixture should be moist.

Once it is completely mixed, pass out a skull pattern to each student. This is just a basic shape that I drew and xeroxed. I also give each student a piece of wax paper with a small piece of masking tape on it (to write their names on).

The wax paper goes on top of the pattern (you can see the pattern through the wax paper, without getting Claycrete all over it). The students put the Claycrete onto the wax paper and begin forming their skull. It should be about 1/2"-3/4" thick and smooth.
By the next week, the skulls are dry and we choose 1 color to paint the entire surface. I use acrylic paint for this (I'm not sure if
 tempera would work or not). Then they add facial features and designs with other colors.

The last step is to use beads, sequins, and broken pieces of jewelry (I have tubs of discarded jewelry that were donated by a local store- Charming Charlie's http://www.charmingcharlie.com/home. That was a HUGE hit!!!) I had them glue these on with craft glue, instead of school glue and that seemed to hold the pieces on a lot better.

I have been putting all of the finished projects into a display case in our main entryway. There are still 2 classes that need to finish this week, but I will add pictures of the finished display once they are complete.


Pin It

First Grade Picasso's

My first graders are going to be learning about European artists this year and the first one to kick off the new year- Pablo Picasso. They loved looking at his portraits and how he made the eyes look like they were looking out at you and also like they were looking off to the side (the profile). They thought it was very silly that the eyes were not aligned in many of the portraits and how he made many facial features different sizes. They noticed that he didn't always use realistic colors to paint his portraits.
We started our portraits by drawing the head. I let them decide what shape they wanted to use. They could use the standard oval shape or be creative and use a non-standard shape. I had some use triangles, rectangles, squares, etc. Then I had them draw a neck and add 2 lines going out from the neck to create the shoulders. I then had them add hair and told them to make it big and wild.                                                                                     They drew a line down the middle of the face to create the nose and then traced everything with a black marker.
We did a quick review of warm and cool colors (something that we had done previously in Kindergarten) and then they used liquid watercolors (I have pretty much given up on using the regular watercolors. The liquid have a much nicer color and I don't have to replace them every day!) to paint their face with either warm or cool colors.                                                                 They drew the eyes and nose on a separate sheet of paper, drawing 1 eye facing forward and the other in profile and then I had them draw a BIG mouth. Again, they traced them with black marker and painted. Except this time, they painted with the opposite color scheme.
They cut out the heads and glued them onto a piece of construction paper, remembering to use dots of glue to keep it neat and then cut out the eyes and mouth. We reviewed the placement of the eyes in Picasso's paintings and they set to work gluing the facial features on their portraits.
There were lots of giggles as they were assembling their projects. They thought they were really silly!!!


Pin It