Thursday, November 10, 2011

PreKinder Louise Nevelson Sculptures

 My PreK classes just finished working on our version of Louise Nevelson sculptures.

We started out by talking about recycling and what it is.

I had pre-strung old record albums with a piece of yarn, so that I would be able to hang the artwork up when they were finished. (There were many interesting conversations with my students who come into the art room before school about what records are. They were fascinated and I felt OLD!

Each table was given a basket full of random odds and ends that I was able to collect: wood scraps, puzzle pieces, plastic ware, unifix cubes, plastic
Easter eggs, etc. Pretty much anything that I could find free or extremely cheap, worked for me!

I gave each student a piece of scrap paper with craft glue on it. I showed them how to dip each piece into the glue and then place it onto the album.

I also showed them how they could build up, placing items on top of one another.
 I thought about painting them in the style of Louise Nevelson, but I thought they looked so great as is, that I left them alone.

I have hung them up in the PreKinder hallway and they look amazing!!!

As a side note, living in Houston, I am lucky enough to have a couple of great resources for finding inexpensive materials to use in recycled art. We have the Center for Recycled Art, which is open 1 day a month- only to teachers. You can fill a brown grocery bag with ANYTHING and pay only $5.

I was able to purchase all of the albums for this project for $5, because they fit into a brown paper bag!

We also have Texas Art Asylum. You can donate your old materials to them and they will resell them or do as I do, and pick up whatever extra items I need for a very low price.

If you live in the area and haven't visited these ladies, I highly recommend it!!!

Pin It

Sunday, November 6, 2011

PreKinder Navajo Blankets

My PreK classes are learning how to make lines, so I decided to incorporate that into a lesson on Navajo blankets.

I prefolded black paper and had them use construction paper crayons to draw the lines dividing each section.

In the middle of their paper, I had them write the first letter of their name (I had cards written up for those who are still learning the letters in their names) and draw a circle around it.

Then they made a different line in each different section on their paper- using as many different colors as they wanted.

I made colored "sand" for them. I did this by using white cornmeal, rubbing alcohol and food coloring, all shaken together and let dry. The colors that I got out of this were so bright!

For this next step, we moved outside- I didn't want my room 
filled with colored "sand".

The students traced their lines with glue and then sprinkled the colored "sand" onto the glue. The PreK teacher, assistant and myself helped them pour the excess back into the containers and then they moved on to the next line.

This actually took us 3 class times (I only see them for about 25-30 minutes), but they look so bright in the hallway, it was worth it!


Pin It

Kindergarten O'Keeffe Flowers

 I think this may be my favorite project so far this year- I may even take a couple and frame them for my house! They turned out absolutely beautiful- all thanks to the post that I saw on Art with Mr. E. I saw the flowers that his students had done and had to try it in my room. Success!

We started by drawing a circle in the middle of our paper and 6 lines radiating out from the center.

Then I had plates of paint for each table: 2 colors plus 2 white.

I showed them how to start in the middle of their
paper and pull the paint towards the edge. Some of them got it, others no. However, some of the ones that did not get the "center-out" idea, ended up with the most interesting flowers, so I didn't stress about it.

The hardest part for the students was not having water to rinse their brushes (I probably need to do this lesson before I get into the painting procedures that I have set up for the art room).

The next week,  they used oil pastels to redefine their lines and add details to the center of their flowers.

Thank you, Mr. E!!! I will definitely be doing this lesson again!!!


Pin It

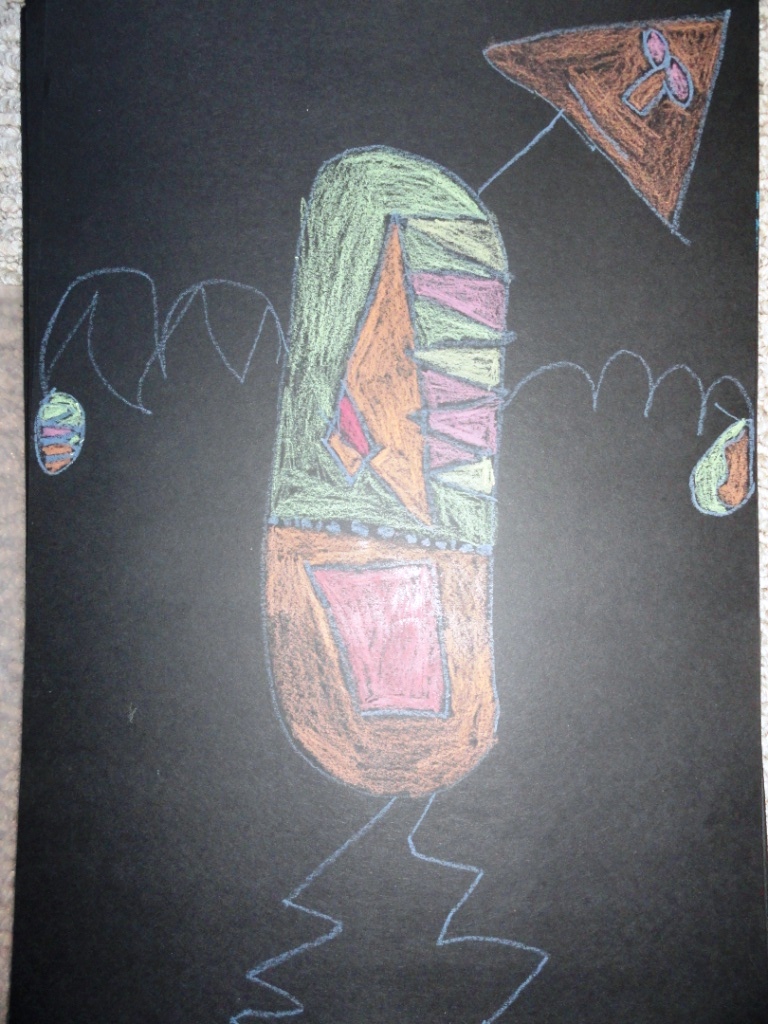
First Grade Joan Miro Portraits

I first saw this lesson on Deep Space Sparkle and decided to adapt it for my first graders who have been learning about lines, shapes and warm/cool colors.

We looked at a variety of different Joan Miro paintings, focusing in on what shapes and lines they saw in his artwork. I found a good sampling of  Joan Miro artwork in a YouTube video and the kids ended up playing a game of "I Spy" searching out all of the lines and shapes.

Then we brainstormed 2 different lists: lines and shapes.

From there, I did a sample drawing showing how we could make the body out of any shape that they wanted to use.

They used 1 line for the neck, 1 line for the arms and another line for the legs, then added a different shape for head, hands and feet.

From there, I had them draw 2 shapes inside the body (trying to use a shape that they had not used previously). 2 lines were then used and I told them that the lines had to go through the shapes.

They added 1 line in each of the hands and feet.

When they were ready to color, we reviewed warm/cool colors and they then had to color each individual section a different color, never letting the same color touch.
Pin It

Saturday, October 15, 2011

Kindergarten Jasper Johns

Kindergarten is learning about American artists this year. Our first artist was Jasper Johns.

I pre-folded paper into 8 sections and had the children decide if they wanted to use letters or numbers. I showed them how to use their pencil to write big in each box. They used a black marker to trace over the letters and the lines so that they would still be able to see them when we began coloring.
I then did a lesson on warm/cool colors. The students who were with me in PK, were excited, because they remembered this from last year. The students who were in the PK center (I only have 2 PK classes at my school. The rest go to a PK center nearby and do not have art classes) picked up on the concept pretty quickly.
I had them choose whether they wanted to use warm or cool colors for their paper. I put a bag of oil pastels on their table and they colored all of their boxes. Usually, this is where they temptation of using oil pastels takes over and I get every color in the rainbow. However, I have to say that this year, they did a really good job of sticking with either warm or cool colors.
When they were finished coloring, I gave them a black oil pastel  and they used this to retraced all of their letters/numbers and the lines.

Then we reviewed the lines that we had learned earlier in the year and they were able to use ANY color (Yea!!) to create a lines in each box.

I have to say, I am really happy with how well they colored these. Usually, I have a bunch that get tired of coloring after about 3 minutes and don't want to continue. This year, they worked on this so hard and the colors turned out really well!


Pin It